


Ready to push your grow even further? Learn how to feed cannabis plants with fertilisers like liquid mineral nutrients or organics and reel in a heavy harvest.
- Cannabis nutrients 101: Understanding the basics of weed fertiliser
- Organic vs synthetic cannabis fertilisers
- Understanding and using NPK ratios for cannabis
- When and how to feed your cannabis plants with fertiliser
- Preventing and diagnosing cannabis fertiliser problems
- Flushing cannabis: The final weeks pre-harvest
- Recommended products and cannabis fertiliser brands
- Cannabis fertiliser FAQs
Key takeaways:
- Balanced nutrition that combines macro, secondary, and micronutrients is essential to growing healthy cannabis plants.
- Synthetic fertilisers provide fast, precise feeding but aren’t as sustainable as organic options (which build long-term soil health and better aromas).
- Cannabis needs nitrogen-rich fertiliser during veg, and more phosphorus and potassium during bloom.
- Tracking pH, EC, and water quality is essential when fertilising cannabis.
- Flushing cannabis is optional. Research shows it has little-to-no impact on the final quality of weed.
Thought good genetics are all it takes for a top-shelf harvest? Think again. While good genetics are the foundation of a great grow, cannabis fertiliser is what fuels plants through every stage of their life.
Use the right cannabis nutrients at the right time, and you’ll trigger faster growth and more resilient plants; the keys to a fire harvest.
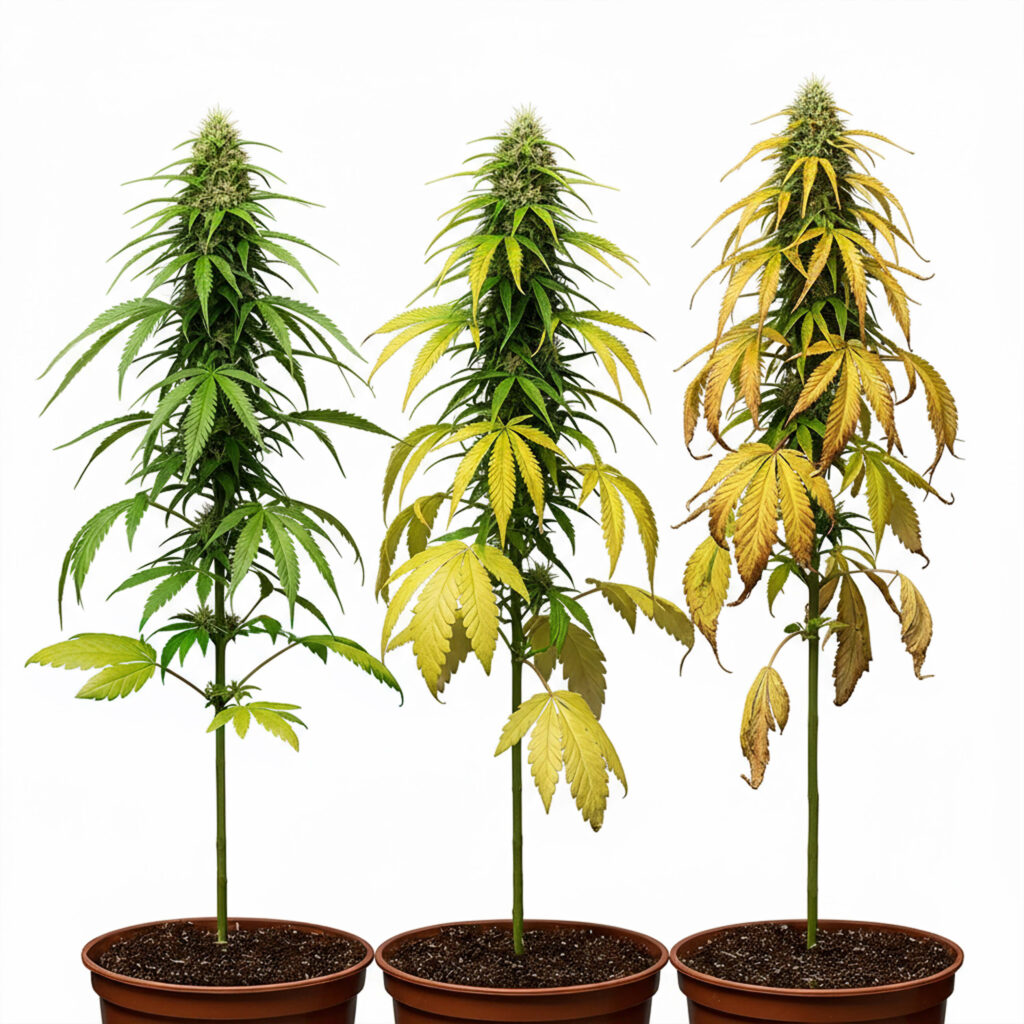
Under or overfeed, however, and you risk dealing with nutrient deficiencies, toxicity, or lockout. While usually not fatal, these issues stress your plants, stunt their growth, and impact their ability to develop thick, resinous flowers.
Ready to fuel the growth of your plants properly? Below, we’ll walk you through everything you need to know about how to use cannabis fertiliser to grow healthy cannabis plants with excellent yields.
Cannabis nutrients 101: Understanding the basics of weed fertiliser
Cannabis fertiliser, whether you buy it in bottles from your local gardening store or make it yourself using natural ingredients like compost, contains chemical compounds that provide energy to your plants.
These chemicals can be categorised into three groups:
- Macronutrients: Represented by the famous NPK formula printed on store-bought cannabis fertiliser, macronutrients (or macroelements) are essential to plant development. They fuel the growth of foliage, roots, and buds, and plants need them in large quantities (which is why they’re called “macros”).
- Secondary nutrients: These are elements that weed plants need in moderate amounts. But don’t let that fool you; secondary nutrients are essential for processes like photosynthesis and nutrient transport. They’re only called “secondary” because plants need them in smaller doses than macronutrients.
- Micronutrients: These are compounds your plants need in trace amounts. Again, that doesn’t mean that they’re not important; micronutrients strengthen cell walls, support enzyme function, aid in nutrient synthesis, and more. Your plants just need them in very small doses.
Macronutrients: Introducing the big three
Nitrogen, phosphorus, and potassium are the giants of cannabis fertilisers. Here’s why they’re so important:
Nitrogen (N)
Nitrogen’s primary role is the synthesis of amino acids, proteins, and chlorophyll (the green pigment in plants responsible for photosynthesis). Plants absorb nitrogen primarily in the form of nitrate and ammonium.
Functions:
- Promotes the growth of vegetation, such as leaves, stems, and branches.
- Integral to photosynthesis and overall plant metabolism.
- Supports the formation of enzymes.
Deficiency symptoms: Yellowing older leaves and stunted growth.
Phosphorus (P)

Phosphorus plays key roles in the growth of certain plant structures and in plants’ ability to produce, transport, and store energy. Cannabis plants absorb phosphorus in the form of phosphate.
Functions:
- Enhances root development and the vigour of young plants.
- Promotes the growth of flowers.
- Enhances plant resistance to diseases and environmental stress.
Deficiency symptoms: Delayed or poor flowering, dark red or purple discolouration of the stems and petioles (leaf stalks).
Potassium (K)

Potassium helps activate certain enzymes and regulates a number of crucial plant processes, from photosynthesis to building proteins and the transport of sugars.
Functions:
- Regulates the opening and closing of the stomata, influencing how a plant uses water.
- Strengthens stem walls, resulting in strong, more resistant plants.
- Enhances drought tolerance.
Deficiency symptoms: Weak stems, yellow/browning leaf edges, and lowered resilience.
Related post

Secondary nutrients
After the big three, calcium, magnesium, and sulphur are also key to the growth of healthy cannabis plants.
Calcium

Just like it helps humans build and maintain strong bones, calcium also supports the development of healthy plant structures. Moreover, it plays crucial roles in the way plant cells communicate with one another.
Functions:
- Maintains the structure and integrity of cell walls and membranes.
- Triggers intercellular signalling and supports the transport of nutrients.
- Promotes the growth of new roots and shoots.
Deficiency symptoms: Leaf necrosis, malformed new growth, poor root development, and weak plant stems.
Magnesium (Mg)

Magnesium is a building block of chlorophyl, meaning its central to photosynthesis. It also helps activate enzymes and participates in the transport of nutrients.
Functions:
- Essential for light capture and photosynthetic energy production.
- Activates enzymes that transfer energy and both synthesise AND metabolise carbohydrates.
- Delivers nutrients to growing tissues.
- Influences the uptake of phosphorus and nitrogen.
Deficiency symptoms: Interveinal chlorosis, leaf curling, and stunted growth.
Sulphur (S)

Sulphur is central to the synthesis of amino acids, coenzymes, and even volatile flavour compounds (meaning it’s vital for growing cannabis flowers that smell and taste great). Plants mainly absorb sulphur in the form of sulphate.
Functions:
- Used to build amino acids like cysteine and methionine.
- Synthesises organic molecules that support the function of enzymes and volatile flavour compounds (like terpenes).
- Involved in the metabolism of nitrogen.
Deficiency symptoms: Uniform chlorosis in young leaves and stunted growth.
Micronutrients
Micronutrients are only needed in small amounts, but still play many important roles for growing healthy plants:
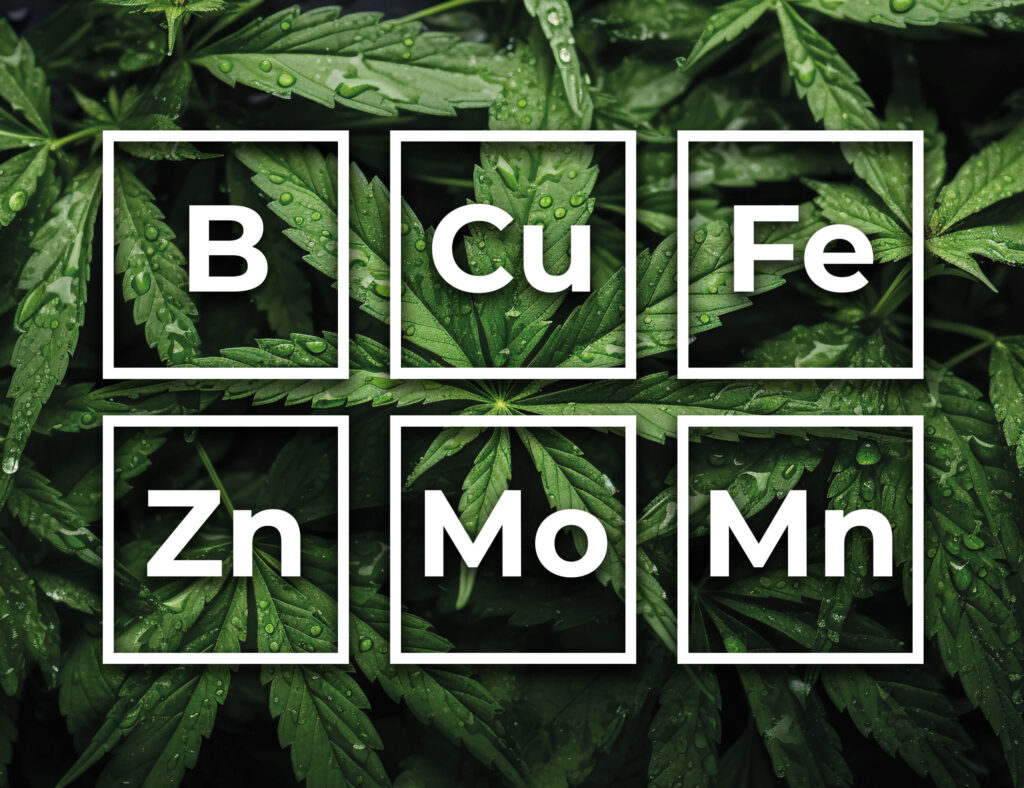
- Boron (B): Taken up as boric acid or borate, boron is essential for maintaining strong, healthy cell walls. It is also involved in the division and elongation of cells when plants develop new roots and shoots, as well as cell signalling. Boron also supports the formation of flowers and seeds, and participates in the transport of nutrients.
- Copper (Cu): Plants absorb copper as cupric acid. It’s used by plastocyanin, an enzyme involved in photosynthesis, and plays a role in the transportation of electrons inside mitochondria. By supporting the formation of lignin, copper also strengthens cell walls.
- Iron (Fe): Taken up as ferrous, iron is vital for photosynthesis; it helps form chlorophyl as well as cytochromes and ferredoxin (compounds central to the photosynthetic electron transport chain, or ETC). Iron also activates enzymes involved in the metabolism and absorption of nitrogen.
- Zinc (Zn): Like magnesium, zinc activates enzymes responsible for synthesising proteins as well as auxin, a plant growth hormone. Zinc is also known to support the elongation of internodes, the growth of leaves, and the formation of pollen and seeds.
- Molybdenum (Mo): Plants absorb molybdenum as molybdate. It’s used by nitrate reductase and nitrogenase, two enzymes responsible for nitrogen metabolism. Molybdenum is also involved in enzymatic reactions that produce vital amino acids.
- Manganese (Mn): Plants need manganese to activate enzymes that metabolise amino acids, carbohydrates, and lipids. It also supports disease resistance.
Related post

Organic vs synthetic cannabis fertilisers
From pellets and powders to diluted liquid nutrients and rich organic compost blends, modern weed growers are spoiled for choice when it comes to choosing a cannabis fertiliser.
So, how do you know which one to use in your garden? One of the first distinctions you’ll have to make is between organic and synthetic fertiliser options. Which one you choose will largely depend on your growing style and preference.
Synthetic cannabis nutrients: Precision and speed
Synthetic cannabis fertiliser contains chemical compounds that are readily available to plants from the moment they hit the soil.
Rather than containing nitrogen-rich organic matter like worm castings, for example, synthetic nutrient solutions contain highly soluble nitrate salts, a form of nitrogen plants can absorb immediately.
This means they take effect very quickly, and hold unique advantages and disadvantages over organic cannabis nutrients.
Pros
Synthetic cannabis fertiliser is great for growers looking to follow a straightforward feeding regimen and dial in exact doses of specific nutrients. Most synthetic fertilisers come with a cannabis feeding schedule, meaning they are easy to use, even for beginners. They’re suitable for all grows, (indoors, outdoors, in soil, or hydro) and may be a little cheaper than organic fertilisers.
Cons
Because plants immediately absorb them, synthetic nutrients can invite overfeeding, especially among inexperienced growers. First-time growers often stress their plants by feeding them too much fertiliser in hope of stimulating more growth.
Moreover, synthetic nutrients can degrade soil quality and structure, meaning they are not very sustainable. Finally, the use of synthetic cannabis fertilisers also creates runoff that can damage the local environment.
Related post

Organic cannabis nutrients: Slow-burn and holistic
Derived from natural sources, organic cannabis fertilisers feed plants slowly and gradually. That’s because they contain organic compounds that need to be broken down by microorganisms like bacteria and fungi before plants can use them.
Some common examples of organic cannabis nutrients include compost, manure, seaweed, bone or fish meal, and guano (or products directly derived from these ingredients).
Pros
Overfeeding is rare with organic cannabis fertilisers, given that they offer a gradual release of nutrients to plants. This makes them attractive for beginner growers or cultivators working with strains susceptible to overfeeding (such as some sativas or autoflowers).
Moreover, using organic cannabis fertiliser promotes the growth of a healthy soil ecosystem that increases the resilience and vigour of plants, and even allows growers to reuse their soil after a harvest. Combined with the fact that they don’t produce toxic runoff, this makes organic fertilisers far more sustainable than synthetic nutrients solutions.
Finally, many growers find that the use of organic nutrients promotes richer, more complex aromas and flavours in their weed.
Cons
If its speed and precision you’re after, organic nutrients won’t cut it. There’s no dialling in exact doses of nitrogen or phosphorus when using compost or bone meal on your plants, and the effects of these fertilisers can take some time to stimulate notable growth.
Organic nutrients, unless you’re producing them yourself, also tend to be more expensive than their non-organic counterparts.
Soil vs hydro fertilisers

Cannabis fertiliser can also be categorised depending on whether it’s formulated for use in soil-based or hydroponic grows.
The main difference here is that soil fertilisers may contain some slow-release nutrients or organic compounds designed to preserve the health of your soil and offer more gradual feeding (though this isn’t always the case).
Hydroponic fertilisers, on the other hand, are typically made from highly soluble nutrient salts that are immediately accessible to plants growing in sterile mediums. Since there´s no soil biology involved in hydro grows, the nutrients in hydro fertilisers need to be readily available from the get-go.
Related post

Understanding and using NPK ratios for cannabis
NPK formulas tell you the ratio (by weight) of nitrogen (N), phosphorus (P), and potassium (K) in a particular fertiliser. For example, a nutrient solution with a formula of 10-5-5 contains 10% nitrogen, and 5% of both phosphorus and potassium.
Based on the stage of life they are in, your cannabis plants will need different NPK concentrations.

NPK ratios for seedling, veg, and bloom stages
Cannabis seedlings grown in soil can get the limited nutrients they need directly from their medium. In hydro setups, very light fertilisers with a 1-1-1 NPK formula are enough to stimulate healthy early growth.
During veg, cannabis likes a nitrogen-rich fertiliser. Look to nutrients with an NPK formula of 3-1-2 or 4-1-2 to promote the growth of healthy leaves and stems.
Finally, blooming cannabis plants need less nitrogen and higher amounts of phosphorus and potassium to produce big, resinous buds. During the early bloom stage, cannabis fertiliser with a NPK ratio of 1-4-3 or 1-5-4 is ideal.
Then, during the final weeks of bloom, consider using a pure potassium fertiliser with a ratio of 0-0-10 or 0-0-20. This will encourage your plants to take up more nutrients. Use bloom supplements derived from molasses alongside your fertiliser to promote the production of thick, frosty resin.
When and how to feed your cannabis plants with fertiliser

In soil
When growing cannabis in soil, you won’t need to feed your plants during the seedling phase. Once in veg, use a fertiliser for the grow stage to promote the growth of healthy foliage. Then, transition to a fertiliser for the flowering stage once your plants have finished stretching.
To feed your soil-grown plants with store-bought nutrient solutions, simply mix your fertiliser with water as per the manufacturer’s instructions (but don’t be afraid to use less than what’s indicated on the bottle, especially if you’re trying a new fertiliser for the first time or growing sensitive strains).
Make sure the pH of your water is between 6.0-7.0 (some growers swear that 6.3-6.8 is the sweet spot for most strains). Recheck pH after mixing your solution and adjust it if needed, Also measure the EC (electrical conductivity) and PPM (parts per million) of your nutrient solution to understand its nutrient contents.
If your soil is very dry, irrigate it lightly with a small amount of plain, pH-adjusted water. Next, add in your nutrient solution. Don’t just dump all the solution into a pot at once; pour it in stages, allowing time for the soil to absorb the solution each time.
Watch the runoff, and test its pH, PPM, and EC. Your pH should be within the same range as it was at input, and your EC should be within 0.2-0.3 of your input. The PPM of the runoff should be lower than that of the nutrient solution.
If your EC or PPM are higher than the input, this is a sign that nutrient salts are building up in your soil, which can cause lockout.
Most soil growers feed their plants once a week, but it’s best to follow the cannabis feeding calendar that came with your fertiliser.
Using organics in a soil grow:
Want to use compost, guano, bone meal, or similar ingredients to fuel the growth of your plants organically? The best way to do so is by using a living super soil.
Made by mixing nutrient-rich organic matter into soil right at the beginning of a grow, super soils can keep your plants fed 100% organically from the minute you sow your seeds right down to harvest.
Alternatively, you can also top-dress regular soil with compost, manure, bone meal, and other natural ingredients. The only downside to this is that the nutrients contained in these ingredients take time to break down and be absorbed by your plants. For a faster approach, learn how to make compost tea here.
Related post

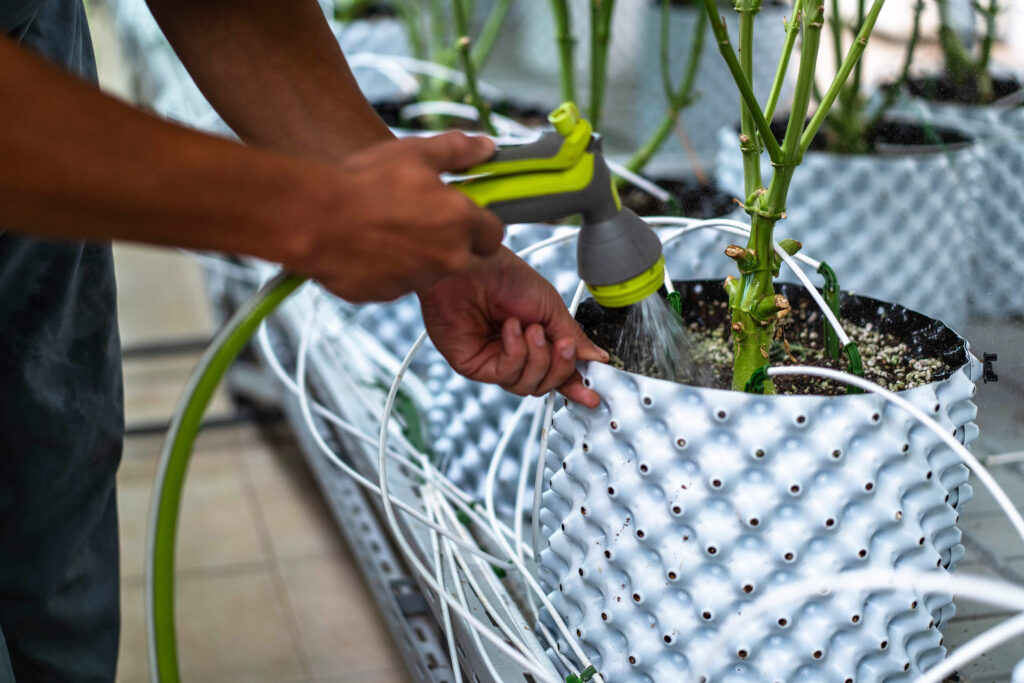
In hydro
When growing cannabis hydroponically, your plants will depend on fertiliser to get all the nutrients they need to grow. During the seedling stage, they’ll need a very light nutrient blend (1-1-1) to grow healthy roots and their first leaves. Then, turn to a nitrogen-rich feed during veg, followed by a phosphorus and potassium-rich blend for bloom.
Mix your nutrients at the dilution recommended by your manufacturer, and check the pH, PPM, and EC of your solution. Aim for a pH of 5.5-6.5 for maximum absorption, and a PPM/EC of:
- 200-400 and 0.4-0.8 for seedlings or clones,
- 300-700 and 0.6-1.4 for veg,
- 750-1200 and 1.4-1.8 for early bloom, and
- 1000-1600 and 1.8-2.2 for late bloom.
Keep the solution aerated and circulating to ensure your plants’ roots get oxygen along with their nutrients.
Many hydro growers like to mix fresh nutrients every time they feed their plants and, where possible, we recommend doing the same. This avoids contamination, pH drift, nutrient depletion, salt buildup, and the development of pathogens in stagnant solutions.
A note on water hardness and pH
Whether you’re brewing compost tea or dialling in the perfect nutrient dose in a hydroponic setup, checking the hardness and pH of your water is crucial to ensuring that your plants get the nutrients they need.
Hard water (that is, water rich in minerals like calcium, magnesium, and bicarbonates) can throw off your nutrient solution by interfering with the uptake of N, P, and K or by causing pH drift (hard water tends to have high alkalinity). Outside the ideal pH range of 5.5-7, cannabis plants struggle to take up nutrients properly.
Finally, hard water can cause salt and scale build up in your reservoirs or around the root zone of your plants. In reservoirs, this buildup can reduce the efficiency of the system’s flow and cause contamination; at the root zone, it can interfere with nutrient uptake and throw off pH, causing stunted growth and stress.
To avoid these issues, always water your plants with rainwater, distilled water, or reverse osmosis (RO) water. Avoid chlorinated tap water wherever possible.
Preventing and diagnosing cannabis fertiliser problems

There are three main issues you can run into when feeding cannabis with fertiliser:
- Underfeeding: When cannabis plants don’t get enough nutrients, they develop nutrient deficiencies that cause stress and stunted growth. Luckily, correcting deficiencies is usually simple and involves balancing your nutrients. Learn how to identify the 7 most common cannabis plant deficiencies and their symptoms here.
Solution: Underfeeding is easy to treat with a good balance of nutrients. Follow the tips in this article and you shouldn’t run into deficiency issues.
- Overfeeding (or nutrient burn): This happens when you give your plants too much fertiliser or grow them in a “hot” (nutrient-dense) soil. When this happens, cannabis plants develop tell-tale signs of nutrient burn:
- Discoloured leaves that are deep green or almost fluorescent.
- Leaf tips that bend up at a 90° angle.
- Discoloured stalks and petioles that are purple, magenta, or red.
- Eventually, yellow leaves with burnt, crispy edges.
Solution: Reduce how often you feed your plants or the strength of your nutrients. In soil, check the pH, PPM, and EC of your runoff when you water your plants. High PPM or EC during watering are a sign that salts have built up in your medium (a common side effect of overfeeding).
- Nutrient lockout: This happens when salts build up in your growing medium or your pH is outside the ideal range, inhibiting your plants from taking up the nutrients you feed them. Over time, your plants will develop signs of a cannabis nutrient deficiency.
Solution: Flush your medium with cold, pH treated water. Test the PPM and EC of the runoff and only resume feeding once the numbers drop (an indication that the salts have been dissolved). In severe cases, you may need to transplant your plants into a fresh medium.
A note on nutrients for autoflowers
Many growers find feeding autoflowers a little tricky. That’s because they are much more sensitive to nutrients than photoperiod strains. However, autoflowers need all the same nutrients as other varieties, just in smaller amounts. When feeding autos, consider using ½ or ¼ of the dose you’d use for a photoperiod strain (or even less if necessary).
Related post

Flushing cannabis: The final weeks pre-harvest
Flushing involves giving your plants nothing but water for a period of up to 1-2 weeks. Most growers do this right before harvest, claiming that it washes excess nutrients from the soil and forces plants to use up any residual energy stores, resulting in buds that taste and smoke better. You can learn all about how to flush cannabis plants here.
Scientific research into flushing, however, suggests that the process isn’t all it’s hyped up to be. To date, the most comprehensive research into cannabis flushing comes from Rx Green Technologies and looked at the effect of flushing for 0, 7, 10, and 14 days.
The outcomes from the study contradict a long-established grower’s norm; flushing produced no meaningful differences in THC; no differences in terpenes, and no reduction in mineral content in the dried flower.
Blind taste tests also showed that there were no consistent preferences for the flushed flower. Flushing does, however, promote the natural aging of plants, helping to bring out those stunning autumn colours so many growers look for before harvest.
So, what’s the bottom line? Along with Jorge Cervantes and other legacy growers, we say that “flushing is optional, not essential.”
Recommended products and cannabis fertiliser brands
Need help picking from the seemingly endless lineup of cannabis nutrients out there? Here are some of our favourites:
Liquid cannabis fertiliser

- Fox Farm Liquid Nutrient Trio: A tried-and-true classic, Fox Farm is a household name among cannabis cultivators. And it got there by delivering reliable results for years. Use the Grow Big blend for veg, and the Tiger Bloom and Big Bloom during flower for a fire harvest with no fuss.
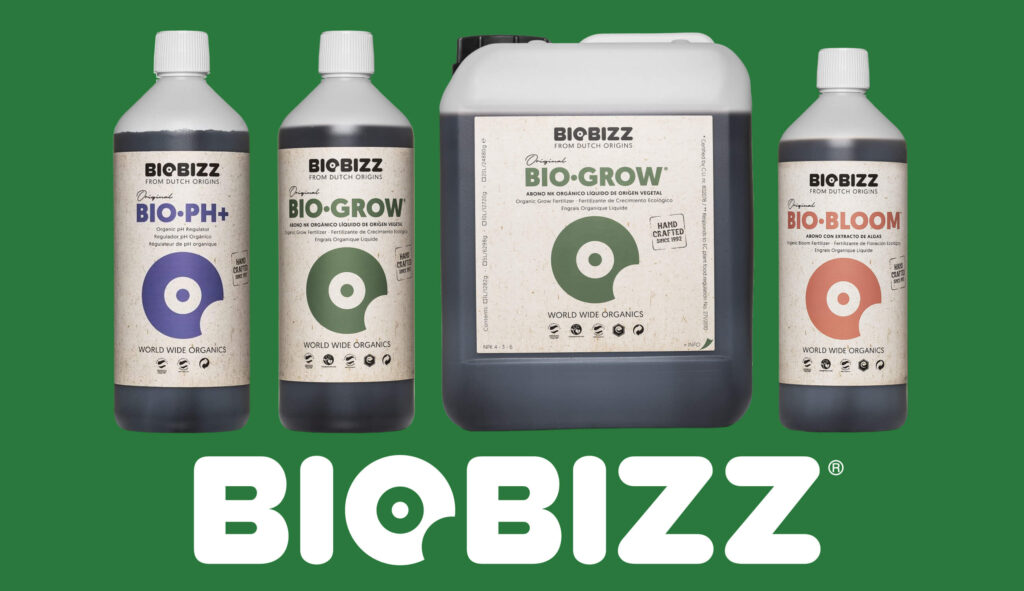
- Biobizz: Certified organic, Biobizz nutrients are the perfect alternative to Fox Farm if you want to minimise your impact on the environment. Use the Bio Grow mix from veg through to harvest, and supplement with Bio Bloom and Top Max once your plants enter flower; the former delivers all the nutrients your plants need to develop buds, while the latter maximises nutrient uptake.

- Advanced Nutrients: One of the biggest players in the fertiliser industry, Advanced Nutrients provides cannabis feeding solutions for both commercial and home growers. The pH Perfect Sensi Grow & Bloom kit is a classic mineral blend, while the OG Organics Iguana Juice line offers an organic solution that’s safe for both soil and hydro grows.
- Mills: Based in the Netherlands, Mills produces bio-mineral fertilisers that are easily absorbed by plants. We recommend using The Basis A&B as a base fertiliser throughout veg and bloom, and supplementing with other Mills products as needed. The Start-R, for example, is a high-nitrogen blend ideal for hungry vegetative plants, while C4 is designed for enhanced flowering.
Organic cannabis nutrients
Growing organic weed is a one-way journey. Once you learn the basics, you’ll never want to go back to using synthetic fertilisers again. Besides producing flowers with exceptional aromas and flavours, growing organically is a must if you’re serious about reducing the environmental impact of your grow.
To grow cannabis organically, learn how to make your own super soil or compost teas using natural ingredients like:
- Compost, manure, blood meal, and worm castings for nitrogen.
- Bone meal, rock phosphate, and bat guano for phosphorus.
- Kelp meal, wood ash, and compost/manure for potassium.
Can you use regular houseplant fertiliser for cannabis?
Wondering why Miracle-Gro, Pokon, Compo, or other houseplant fertilisers get a bad rap from cannabis growers? It has to do with the extended-release nutrients often found in their pellets, sticks, or potting soils. While these work great for houseplants and vegetables, they make it easy to overfeed sensitive plants like cannabis.
That said, liquid fertilisers from these brands don’t contain slow-release nutrients and can work fine for cannabis if their N-P-K ratio suits the plant’s growth stage and you dilute them properly.
Related post

Cannabis fertiliser FAQs
Got questions about how to feed your weed plants with fertiliser? Check out our list of fertiliser FAQs below. If you can’t find the answer to a particular question, ask us in the comments.
Finally, be sure to share this post with other growers so we can all enjoy a fire harvest!

A: We recommend using organic nutrients to grow cannabis. Super soil works great, as do organic liquid fertilisers like Advanced Nutrients, Mills, and Biobizz.
A: Nitrogen, phosphorus, and potassium are the big three macronutrients cannabis needs for survival. However, secondary and micronutrients are also important for growing healthy plants.
A: This depends on your setup. In hydro, you’ll need to start feeding your cannabis plants in the seedling phase. In soil, most growers start feeding their plants from weeks 1-2 of veg.
A: For veg, cannabis needs a nitrogen-dominant nutrient blend (a NPK ratio of 3-1-2 can work great). During bloom, on the other hand, cannabis plants need less nitrogen and more phosphorus and potassium (try a NPK ratio of 1-4-3).
A: Synthetic fertiliser can come from non-organic sources and may contain mineral nutrients that are immediately available to plants. Organic fertilisers, on the other hand, come from natural sources and need to be broken down by fungi or bacteria before they can be absorbed by plants.
A: Not always! Super soil can keep your cannabis plants fed from seed through to harvest without ever requiring extra feeding.
A: Most growers using liquid fertilisers feed their plants once a week or every second or third watering. However, follow the cannabis feeding chart that came with your nutrients for the best results, and be weary of overfeeding.
A: Soil growers can use hydroponic nutrients if they want. Hydroponic growers, however, must use hydroponic nutrients as they’re carefully formulated so as not to rely on soil biology to become available to plants.
- Disclaimer:Laws and regulations regarding cannabis cultivation differ from country to country. Sensi Seeds therefore strongly advises you to check your local laws and regulations. Do not act in conflict with the law.

I have replaced dried egg shells, dried potato skins, coffee grounds with liquid instead and works better then the dried fertilizer together. To make potato water, you need to boil few potatos in a pot for an hour without adding any salt or spices then cool it down for able to put it in the water container and you have potato water fertilizer, I also make 2 cups of French Vanilla coffee then cool it down then add it to the container plus I add extra water since my containers are 4 litres size, I use fresh milk for calcium with water added, I don’t need to use those died fertilizer, I still wanna try the apple juice with added water, potato water works the best so far I noticed on my MJ’s
Good morning Laban,
I hope you’re having a great day!
Thanks so much for sharing your recipes for organic home-made fertilizers.
I will have to checkout out the potato water recipe!
I hope you continue to enjoy the blog,
Mark
Anybody tried crush fish bones added to soil to provide high calcium and phosphorus, I never seen a footage yet by someone added crushed fish bones
I should experiment on that fishbone and see what happens
Thinking about nutrients for the plant growing above the Arctic Circle
Good afternoon Laban,
Thanks so much for your recommendations,
I haven’t tried using crushed bones as a fertilizer, but i’m sure it would be a great provider of calcium.
I would love to see the outcome of this, can you please keep us updated?
Thanks again, and have a great day!
Mark
I use fermented plant juice (FPJ). For nitrogen I use nettles (picked at dawn) and chopped up and added with organic brown sugar at a ratio of 3:2. Mix really well and leave in a jar for 5 days, the strain through a sieve. Leave inverted on the sieve for a few hours to get all the good FPJ. You can store for about six months. Here’s the two benefits: 1. No horrible smell that you get with nettle water; 2. And this is important, you dilute 1:500 with rain water. So 250 mL lasts ages!
For flowering stage, instead of nettle FPJ, use the same process but with Comfrey or any borage. Cheap, eco friendly and effective. Both are broad spectrum supplements meaning you get many micro nutrients.
This year, I will use leaves from my cannabis plants as you cannot get a more specific supplement for that, but only for the growth phase, not flowering.
Good afternoon Jobes,
I hope you’re having an awesome day,
Thanks for sharing your recommendations with us,
Keep up the great work!
Cheers,
Mark
wow, I’m so glad I stumbled onto this article ( was looking for pics of diff. leaf deficiencies I never really thought about adding straight from the leaves of my girl’s! such great info ,thnx !
If you want plenty of nitrogen put in the soil olive leaves , if you want calcium put ashes in top of the soil but the ashes must be clean , only from trees , no paper or other chemicals burned 😄
Hey Axaios,
Thanks for your comment and your feedback.
This article on What is Veganic Growing? New Take on Organic Cannabis might also be of interest to you.
Thanks again, and I hope you continue to enjoy the blog.
Have a great afternoon!
Mark
Hey Axaios- thanks for the tips about Olive leaves. Do they need to be broken down? Or just mixed into the soil? With Gratitude, 1st time planter.
Or…you can feed all that to a rabbit and compost it’s waste.
Nettles do make a very good liquid fertilizer; Firmly pack a drum with nettles, pulled out of the ground with the roots, and add water to cover them. Then be prepared for an almighty stench after a couple of weeks! Start adding the liquid in small proportions to your watering can when the stems have rotted. You may add more water to the drum as the rotting continues. It is advisable to keep a lid on the container and try not to get the liquid on your hands as the stink seems to stay in your skin forever. Good luck!
Hi Birdman,
Great, thank you so much for the info!
With best wishes,
Scarlet
Come diceva Andy un macerato di ortiche è ottimo, aiuta a prevenire attacchi dei parassiti e funghi, in più aiuta molto la fotosintesi nelle foglie…. Da provare…. Ciao….
[from google translate, for the non-Italian speakers (including me): “As Andy said, a maceration of nettles is excellent, helps prevent pests and fungi, plus it helps photosynthesis in the leaves …. To try…. Hello…” – Scarlet]
Apparently nettles are very good when left in water for a couple of weeks.
Hi Andy,
Thanks for the info! This is surely one of the cheapest ways of making your own fertilizer also 🙂
With best wishes,
Scarlet