


Growing cannabis may seem daunting at first, but it’s much like cultivating any plant. However, rushing in can lead to costly mistakes. Take your time to properly set up your grow space and minimise risks while maximising potential. Strap in – this extensive Sensi Seeds grow guide will equip you with the essentials for a successful grow!
- Why grow cannabis indoors?
- How long does it take to grow cannabis?
- What do you need to grow cannabis indoors?
- Building an indoor grow room
- Why grow cannabis outdoors?
- How much light does it take to grow cannabis indoors?
- Germination and seedling
- Caring for a vegetating cannabis plant
- Caring for a flowering cannabis plant
- Why, when, and how to flush cannabis plants
- How to harvest cannabis
- Tips for curing cannabis
- Controlling odour in an indoor grow room
- Daily maintenance of your grow room
- Practice makes perfect
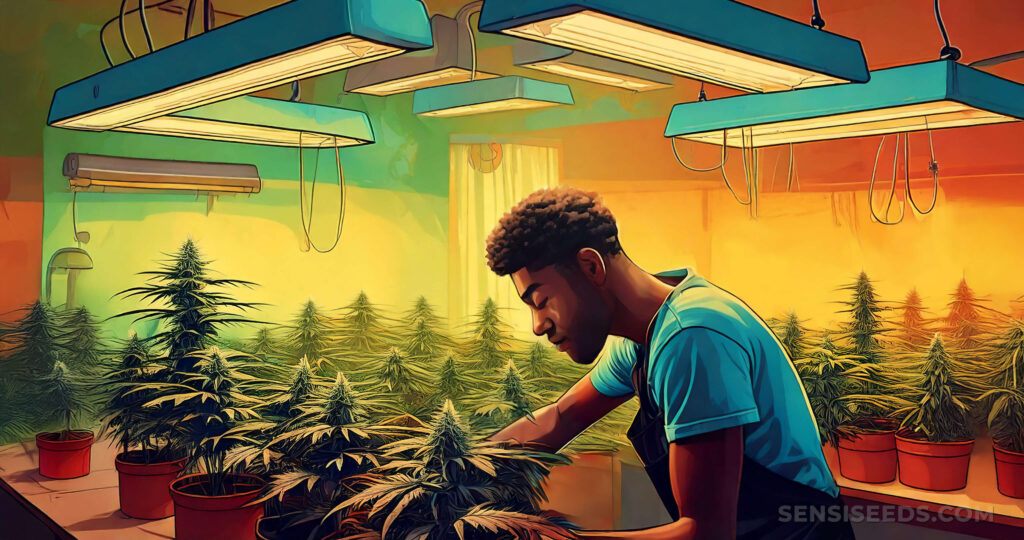
Why grow cannabis indoors?
Whether it’s about saving money, trying something new, or just the search for the finest cannabis in the land, there’s no wrong reason to want to try your hand at growing your own.
1. Quality
We’re all a little sceptical about pre-packaged products. While the overwhelming majority of legal cannabis retailers are respectable, above-board enterprises, not everyone has access to these shops. By growing your own cannabis at home, you can be 100% certain of what you’re getting. Additionally, by growing indoors, you get complete control over every aspect of the plant, allowing you to maximise its potential.
2. Versatility
Growing your own cannabis (particularly indoors) gives you freedom from the seasons allowing you to grow on whatever schedule best suits you. If you’re growing outdoors, taking a summer vacation might not be possible, but many indoor growers do the bulk of their work in the fall/winter. Beyond that, you can choose to grow whatever strain you want making sure that your stash is always perfectly suited to your wants and needs.
3. Discretion

As sad as it is, we live in a world where crime is a thing. A bunch of large, healthy pot plants sitting in a backyard is an incredibly tempting target for unsavoury types. By growing indoors, you can control who has access to (and even knowledge of) your grow. If you have a nice car, you keep it in a garage so give your nice plants the same respect.
4. Speed
Outdoor growing is tied to the sun and the seasons and (except some fast-flowering autoflowers) you can’t get more than one harvest per year. Granted, these harvests are going to be far larger than an indoor grow but they’re far less frequent. Think of it as the equivalent of not putting all of your eggs in one basket.
5. Control

No matter how hard you try, you can’t control the weather. Weeks of heavy rain, a late frost, early snowfall, or even wild animals can all cause the complete destruction of even the healthiest garden. Growing indoors gives you total control over light, heat, humidity, water, feedings, and pests.
One aspect of growing cannabis that can surprise newer growers is that we’re (mostly) only interested in female plants for reasons I’ll go into further down. Growing indoors is the only way to be certain that you won’t get any pollen in your garden. Even if you’re an outdoor grower who is vigilant about removing every male in their grow area, you can never be certain that a neighbour upwind isn’t letting their males grow.
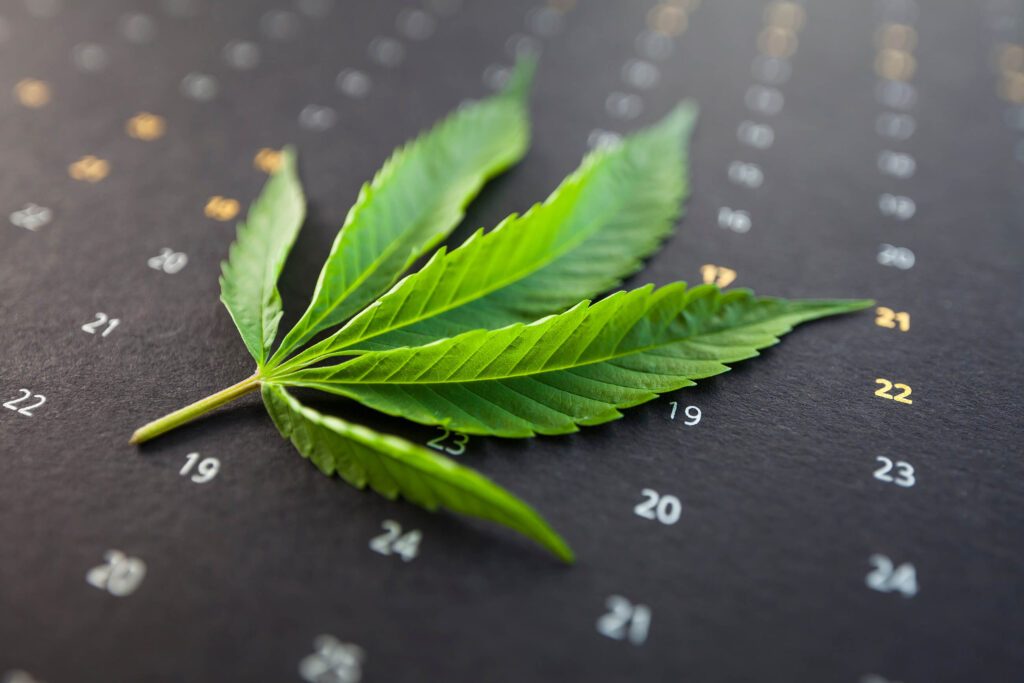
How long does it take to grow cannabis?
While it varies from strain to strain, a rough estimate is about three months from planting to harvest though some growing techniques (such as mainlining) can potentially double that. As a general timeline, most growers plan around something like this:
- Germination/seedling: 3-10 days
- Vegetating period: 3-12 weeks
- Flowering period: 8-12 weeks
Of these, the only one that you can control is the vegetating period. Growers using a sea of green may only vegetate their plants for a few days, while those using more advanced methods like scrogging or mainlining may take months to set up their plants.
- Read more about the life cycle of a cannabis plant
- Read more about cannabis plant training techniques
- Read more about SOG
- Read more about SCROG
- Read more about mainlining
What do you need to grow cannabis indoors?
As with any project, making sure that you have all of the right tools is essential to success. By taking the time to get everything you need before you start, you seriously improve your chances at a successful first harvest.
1. Seeds
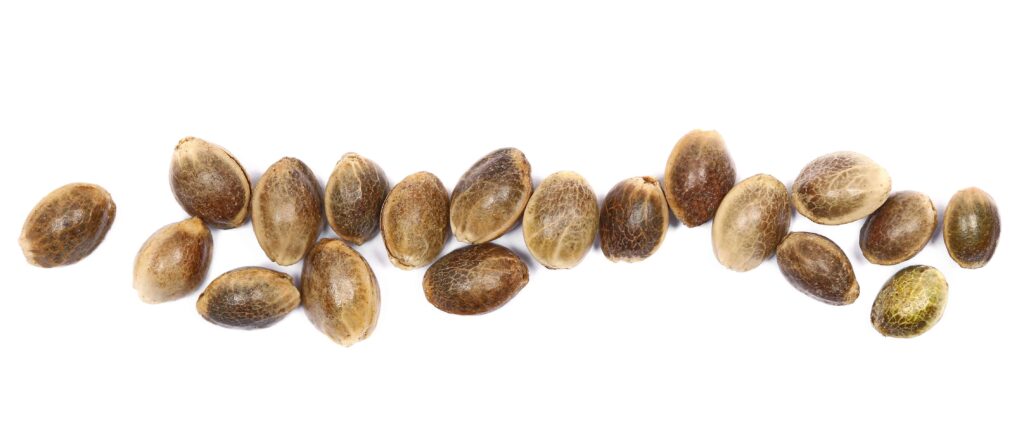
Of course, to grow cannabis you need the right seeds. Fortunately, no matter what kind of grow space you’ve got, there’s a strain that’s tailor-made for you. If you’ve got a high ceiling but limited floor space (like a broom closet), a sativa like Jack Herer might be what you want. On the other hand, if you’re growing in a wide area with limited headroom (such as a crawlspace or attic) then a more indica-dominant strain like Banana Kush Cake might be what you’re looking for.
- Read more about the differences between indica and sativa strains
- Read more about regular vs feminized seeds
2. Rooting tray/sponges
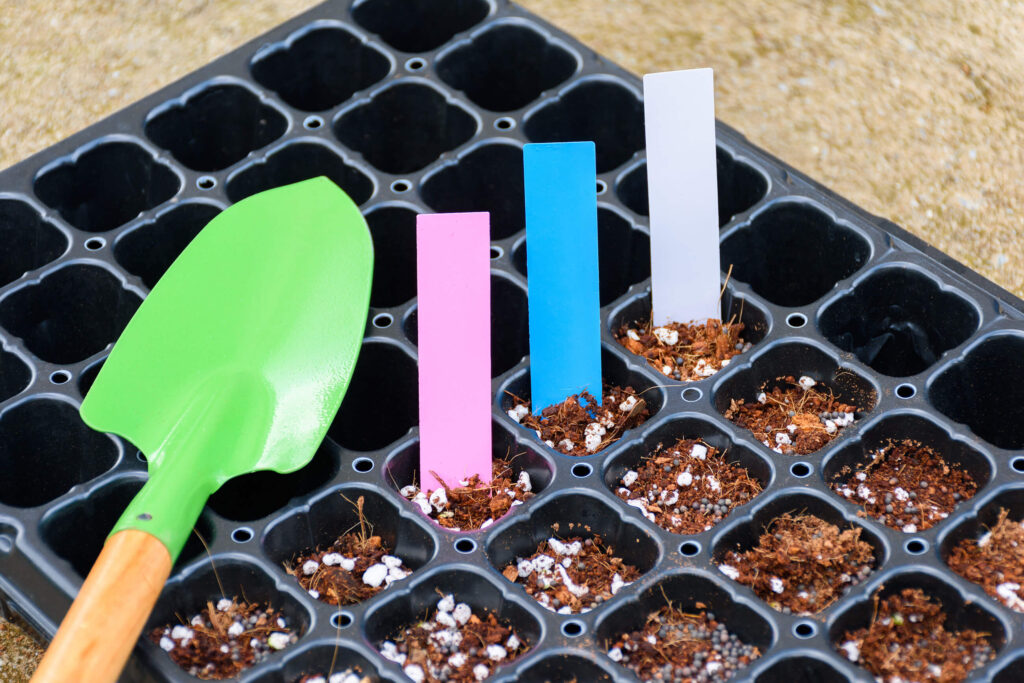
After germinating your seeds (more on that below) you’ll then need to move them to a sponge/rooting tray before planting. By giving your seeds a few days to fully develop their early roots you’ll help them survive the planting process. Luckily, sponges are cheap and the trays are reusable. Try to get one with a clear plastic lid as seedlings need a lot of humidity at this stage.
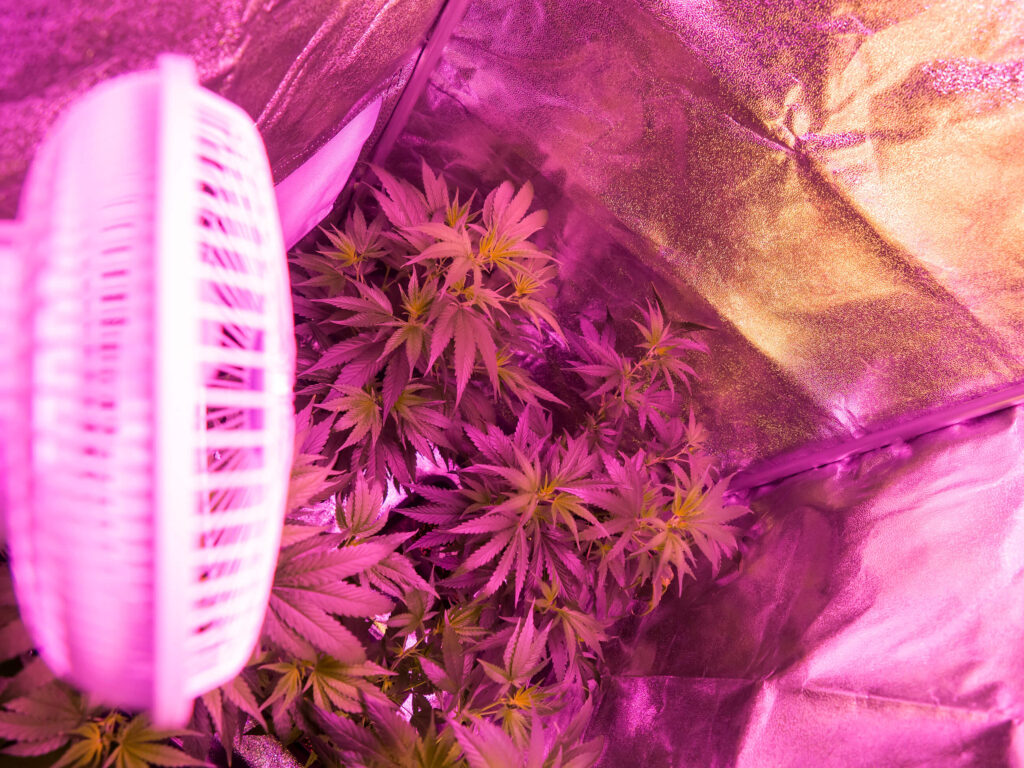
3. Light
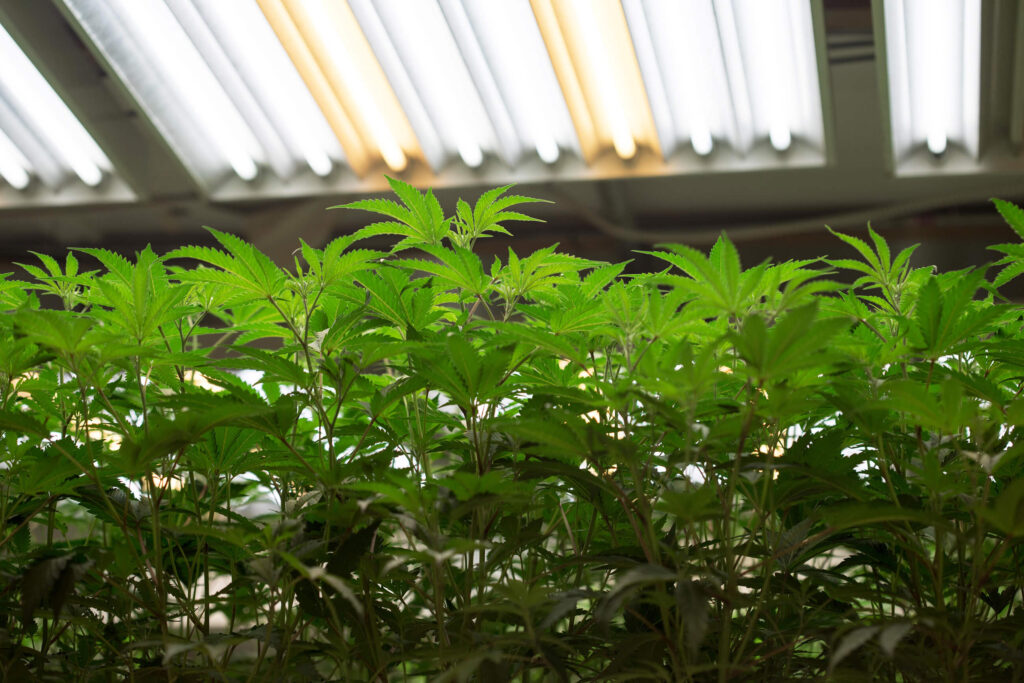
Without a doubt, the single most important part of your grow room. At the most basic level, the more light you give your plants, the bigger and better they’ll grow—to a point. There is such a thing as too much light and I’ll go into far more detail a bit further down.
- Read more about lights
4. Fans
To keep your grow room from getting too humid, you’ll need extensive external ventilation. Typically, a small inline can fan is more than enough, though you may need to step up the size if you’re using hot HPS lights. Make sure that the ventilation fan you choose has enough capacity to empty the entire volume of your grow space every one to three minutes.
Therefore, if you have a grow space with a volume of, let’s say, 10 m3 then you’ll need a fan with an airflow capacity of about 350 CFM (cubic feet per minute; most extraction fans are measured in imperial units). It’s worth mentioning that a fan by itself won’t do much, you’ll need to get some simple ducting, too. This is cheap, just make sure it’s the same diameter as your fan.
On top of external ventilation, you’ll also need internal oscillating fans. These help provide airflow over your leaves which hinders the growth of mould. Additionally, a constant, gentle breeze will help your plants develop stronger branches.
- Read more about grow room ventilation
5. Timers
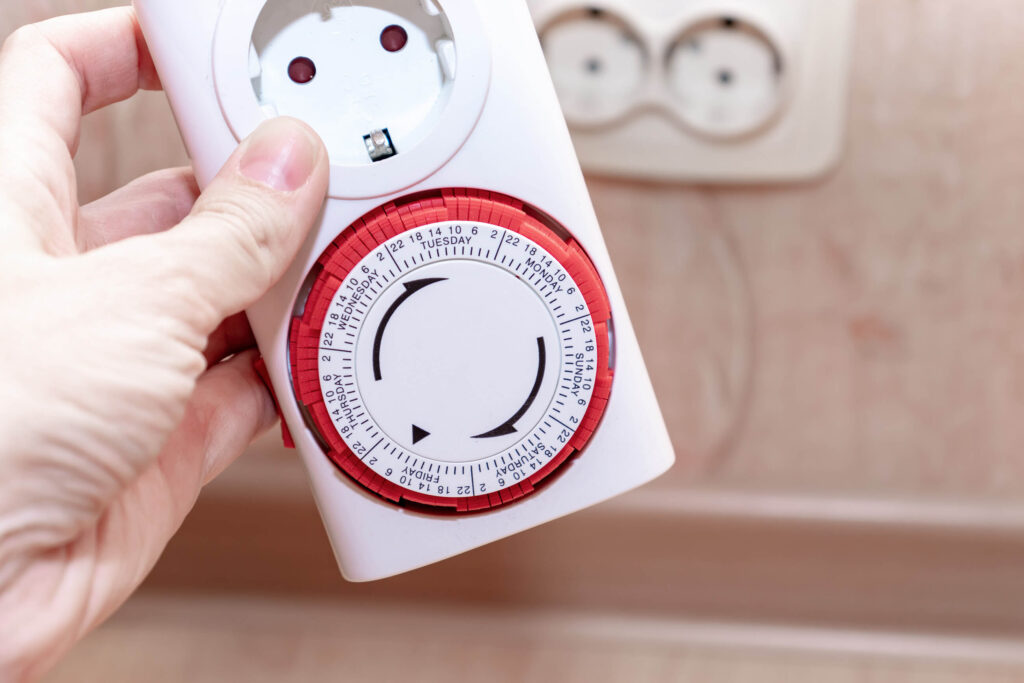
You don’t need your light on all of the time and you may wish to give some of your fans a break while the light’s off and the room is a bit cooler. A simple automatic timer will save you a world of hassle.
6. Thermometer/hygrometer
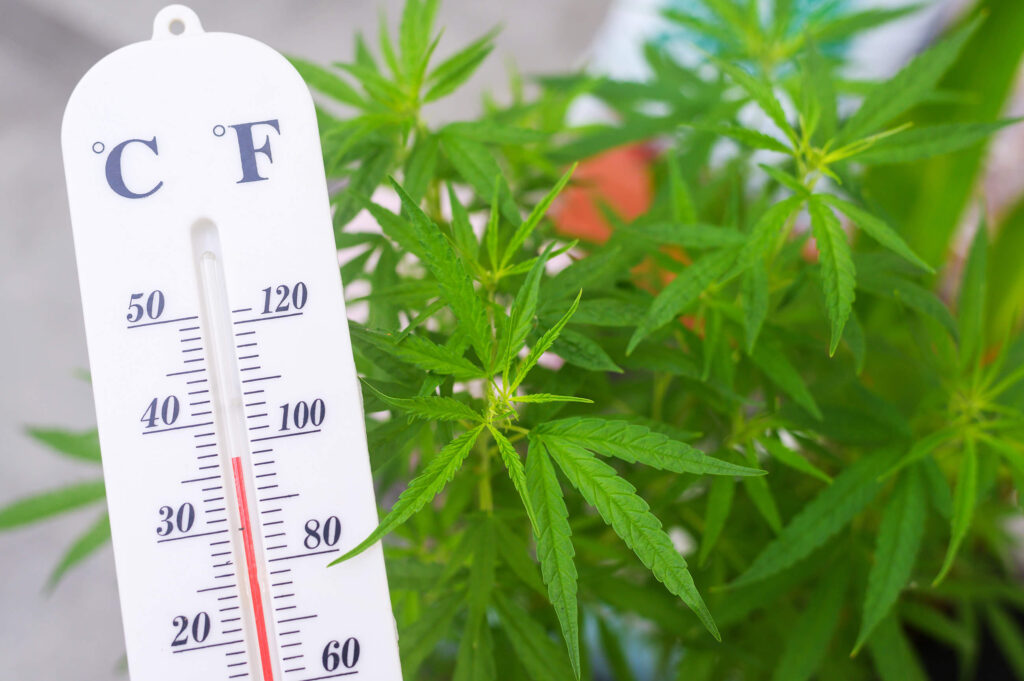
A simple combo thermometer and hygrometer (humidity sensor) will help you keep track of the conditions in your space and make sure that things don’t get too far out of bounds. Ideally, a grow room should be kept in the 23°C to 28°C range with ideal humidity sitting around 60% for vegetating plants and dropping to 50% in late flowering.
Aside from these, you may need a humidifier, dehumidifier, space heater, or even a small A/C unit depending on the climate where you live.
7. Pots
If you’re growing in soil, you’ll need one pot for each of your plants. While it might be tempting, do not grow multiple plants in the same pot as they will compete with each other and reduce your harvest immensely. Any old flower pot will do, but there are things to consider.

Terracotta flower pots are classic and easy to find but they’re incredibly heavy, have no handles, and are somewhat fragile. If you’re only growing one plant, this might be an OK option, but if you’ve got a room of 10 or more, then you don’t want to be carrying these things around.
Plastic and fabric pots are easily the most popular options as they’re cheap, reusable, and easy to move. Between the two, I have to recommend fabric pots (also known as “grow bags”) as they provide better soil aeration, drainage, root development, temperature regulation, and more.
How big of pots you need depends on how you plan on growing your plants. If you’re simply growing one with minimal training, about 10 litres is a good place to start. For growers doing a sea of green, you can go as small as three litres. On the other hand, if you plan on scrogging or mainlining, then going up to 20 or even 30 litres might be worth considering.
8. Nutrients
Cannabis plants are hungry and a plant in full bloom can go through a lot of nutrients. Stock up early so that you don’t risk running out mid-grow. If you don’t know what kinds of nutrients you’re looking for, the process can quickly become overwhelming as there are hundreds of different products out there.
If this is your first time, start off with a simple three-part nutrient pack. These come with a bottle of nutrients for the vegetative and flowering stages as well as a bottle of micronutrients for use throughout your grow. Over the course of a plant’s life, you’ll use far more flowering nutrients so be sure to keep that in mind when you’re making your purchase.
- Read more about nutrients (macroelements)
- Read more about home-made fertiliser
9. Soil/medium

If you’re growing in soil, you’ll need enough to fill all of your pots. There isn’t exactly a 1:1 ratio between pot volume and soil required as soil tends to compact after watering, but it’s a good place to start. Even if you’re growing hydroponically, you’ll need something to actually plant your seed in. Rockwool cubes and inert clay pellets are both great options.
- Read more about selecting or making soil for cannabis
10. Watering can
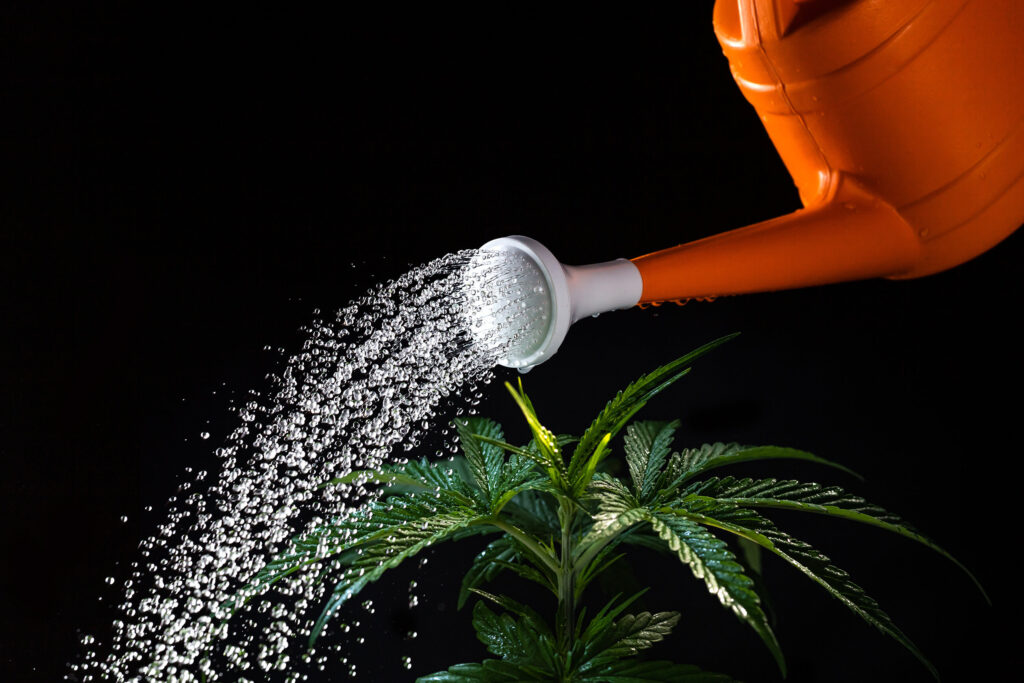
You’ll need to be carrying A LOT of water to your grow room and a small 1-litre pitcher simply won’t cut it. A 5- or 10-litre watering can is the sweet spot for convenience and utility.
11. Water & air pumps
These are only needed if you’re growing in hydroponics, but in that case, they are absolutely vital. If you’re going this route, be sure to always have at least one backup pump on hand in case one goes down. Please learn from my mistakes here, even a day without a running pump can be enough to kill a plant in full bloom.
12. Additional equipment
This is by means an exhaustive list of what you’ll need, but it’s certainly enough to get started. On top of this, tools like pH test kits, EC meters, wooden support rods, foil tape, and so many more all play key roles in an ongoing grow. As you make your way through your first few harvests, you’ll figure out what you need as issues come up.
- Read more about EC
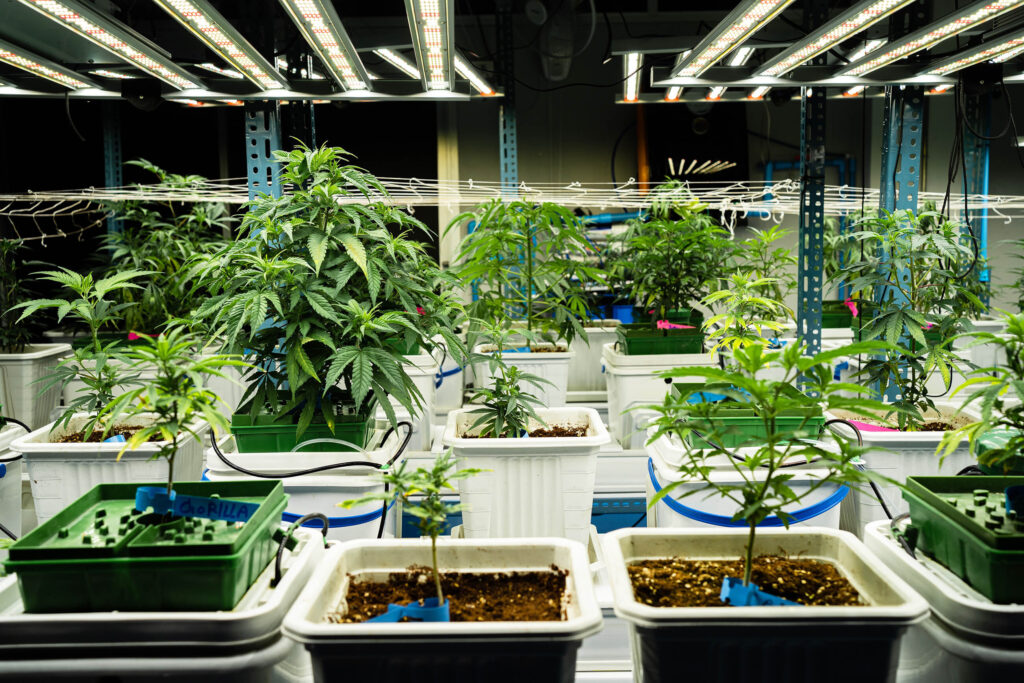
Building an indoor grow room
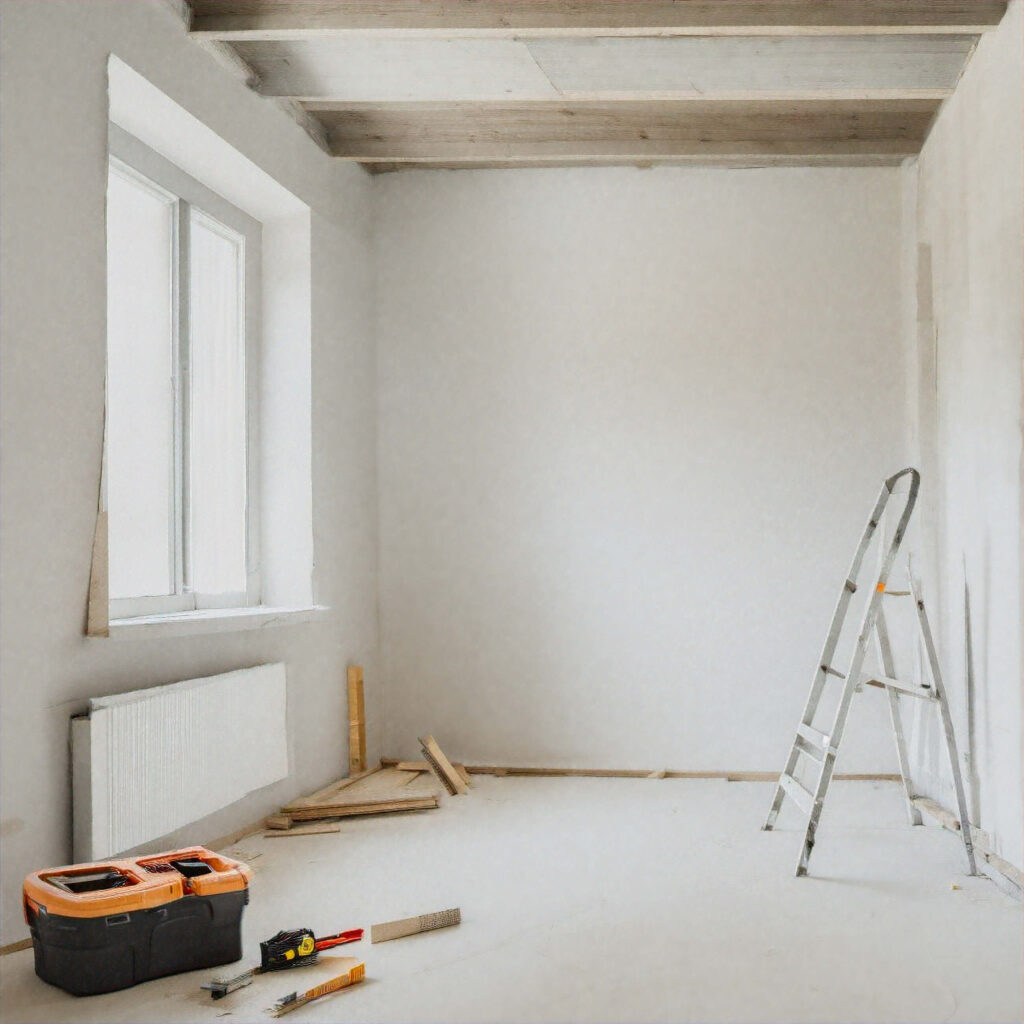
Once you’ve got everything you need, it’s time to set up your grow space. This can be a bit of a chore, but it’s the kind of thing that you only have to do once—if you do it right the first time.
1. Measure your space
Before you even get started buying equipment or picking strains, you’ll need to accurately measure your grow space. The area and volume of your space are the single largest factors when deciding how many plants to grow, what strains are best, how much light and ventilation you’ll need, and several other considerations. These all need to be sorted before you start as changing equipment mid-grow is always a challenge.
2. Clean the room
Growing cannabis indoors is dirty—especially if you’re growing in soil. While it’s impossible to keep any grow space spotless, regular cleaning and daily maintenance will help you set yourself up for an easier time overall.
Before you get started, take the time to wipe down all of the surfaces and all of your grow equipment. A rag and some isopropyl alcohol are all you need for most things and this will help prevent the development of any mould or algae down the road.
3. Lightproofing
Your grow space should be as lightproof as possible. If you stand in there with the lights off, it should be pitch black. This has two main benefits: privacy and plant health.
Privacy is a given. Grow lights are incredibly bright and shining a beacon to your neighbours at all hours of the day and night is hardly subtle. Also, anyone coming over might ask questions about the glowing closet in your kitchen.
But plant health is the real reason for lightproofing. Photoperiod cannabis plants only begin flowering when they are kept under no more than 12 hours of light and do most of their flowering in the dark. If there’s too much light spilling in, your plants might not ever start flowering and even if they do, the buds will be smaller and less potent. This is less of an issue for autoflowering strains, but every plant needs its beauty sleep.
Fortunately, lightproofing is cheap and easy. All you need is some mylar, opaque plastic, wood, or even just a black trash bag to cover any windows and some basic weatherstripping is typically more than enough for most doors.
4. Provide sufficient airflow
Any grow tent on the market today will have multiple options for external ventilation. However, if you’re growing in a closet, garage, or attic, your options are likely far more limited. If you can, venting directly outdoors is always the best option, though it does come with challenges.
Holes typically go both ways; if you can vent air out then things can get in. Always be sure to cover your vent with a screen—even if it’s indoors. Anything that flies or crawls inside could get caught up in your fan and that could be an absolute disaster.
If, for whatever reason, you simply cannot run external ventilation, you’ll need to go overboard on internal airflow. So long as the temperature and humidity aren’t too high, you should be OK. Still, if your grow space can’t be ventilated, you’re probably better off buying a grow tent or finding a new place to grow.
5. Choose and set up the lights
Hanging your grow lights is an incredibly important part of a good grow space. Now, if you’re growing in a garage under a 1000W light, then fixing it in place is perfectly fine. However, for most smaller-scale growers, you’ll want your lights to be adjustable. There are all manner of ways to rig up your lights so find what works best for your setup.
Eye hooks mounted from the ceiling are always a great choice, but may not be an option for everyone. If you don’t want to cause any damage, telescopic curtain rods are an incredibly easy and cost-effective way of supporting grow lights. I cannot stress enough how important securing your lights is. A collapsed light will, at best, destroy your plant and could even start a fire.
A final point on lights. There’s a bit of a debate on the best kind of wall for a grow space; matte white or reflective foil. The difference between the two is negligible. If you’ve got flat white walls, you’re all set. If not, covering your walls with aluminium foil or mylar is a great choice.
- Read more about building an indoor grow setup
Considerations for soil
Getting the soil set up is super easy. All you need are pots and dirt. I prefer fabric pots as they allow for greater aeration of the soil, they’re lighter, and they’re easier to store. Don’t forget the plastic trays underneath, either. Otherwise, you’ll get water leaking all over the place and that’s the fastest way to a mould problem.
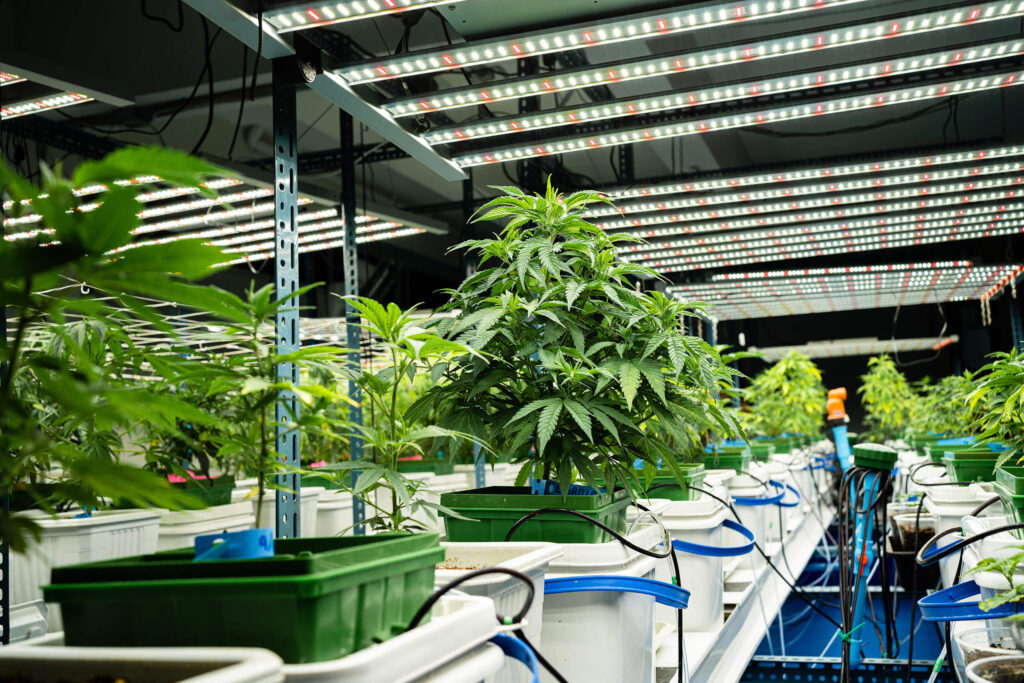
Considerations for hydroponics
Hydroponics setups can vary considerably from one to the next but even the simplest is far more complicated than soil. Regardless, they all function in mostly the same way.
The basic idea is to surround your plants’ roots in an oxygenated, nutrient-rich bath. One common method is recycled deep water culture (RDWC). A sample RDWC setup might use a three-pot system with two grow sites and a main reservoir. At this stage, all that needs to be set up are the pumps as there’s no need to get the water running before planting.
For a setup like this, you need two pumps; a water pump and an air pump. These air pumps are each fed through plastic tubes to a simple aquarium air stone at the bottom of each grow bucket. It’s important to have one of these for each plant as the water needs to stay oxygenated.
The water pump is another must as stagnant water is a breeding ground for algae. The size of the pump isn’t incredibly important as long as it’s moving water. But you want something with enough power to pump the water out quickly—ideally, the water should be circulating 2-3 times per hour. Also, you’ll be changing out all of this water every 7-10 days, so a powerful pump will make that considerably faster.
- Read more about soil vs hydro in cannabis cultivation
Why grow cannabis outdoors?
Of course, many growers in more temperate parts of the world have access to the incredible power of the sun allowing them to grow plants that indoor growers could only dream of. Outdoor growing won’t be a good fit for everyone but for those with the space and climate, it’s a very tempting proposition.
Benefits of growing cannabis outdoors
- Solar powered
Everything that indoor growers do is dedicated to replicating the conditions that nature has freely provided. Even the most powerful cutting-edge grow lights are a dim comparison to the sun and outdoor growers get unrivalled access to that power. The two most important things for any plant are water light and water and there’s simply no substitute for Mother Nature.
- Room to grow
All other things being equal, an outdoor plant will always grow larger and produce more than an indoor plant. By giving plants adequate space to stretch their branches, outdoor growers can see harvests that indoor gardeners can simply never replicate.
This is even reflected in how we measure harvests, with indoor harvests being measured in grams per square metre while outdoor harvests are measured in grams per plant. If your goal is purely size and yield per plant then there’s simply no competition here.
- Reduced maintenance
Indoor plants need a lot of careful attention. Pruning, defoliation, and high- and low-stress trainingall take precious time and energy which growers could be spending elsewhere. Since outdoor plants can absorb light from all directions throughout the day, there’s no real need for advanced growing techniques like lollipopping or topping. In fact, these could be detrimental depending on your circumstances.
- Lower costs
As I went over above, you won’t need nearly as much equipment to get started with growing cannabis outdoors. You pretty much only need a bigger pot. Additionally, your ongoing costs will also be much lower as the operating costs for even energy-efficient LEDs are considerable over a year.
- Read more about growing weed indoors vs outdoors
- Read more about the right soil for an outdoor grow
Risks of growing cannabis outdoors
- Space intensive
Since outdoor plants tend to grow much larger, growing cannabis outdoors requires far more space than an indoor garden. Exactly how much area to allocate for a single plant can vary wildly but a good estimate is that a plant needs a growing area a minimum of 1.2x the expected height. Therefore, if you’re planning on growing a 1-metre-tall plant, then you need to give in an area of 120×120 cm.
Since many outdoor plants can easily grow to two (or even three!) metres in height, you can see just how much space an outdoor grow setup can require. However, if you’re committed to growing a 3-metre plant then growing just one might be enough.
- Fixed schedule
Most parts of the world have a very limited growing season. Much of Europe, for example, has a growing season ranging from roughly April to September and outdoor cultivation is simply not possible outside of this window.
What’s more is that even within this window, growers can only squeeze in a single harvest (barring a few incredibly fast-flowering autoflowering strains). While indoor growers can potentially harvest every 10-12 weeks throughout the entire year, those keeping their plants outside only get one shot.
Oh, and if you plan on taking a holiday over the growing season, forget about it. While outdoor growing might require a bit less work than an indoor garden, it still requires daily attention. Jetting off for two weeks in the middle of the growing season simply isn’t an option.
- Less secure
As sad as it makes me to say it, crime exists. Unless you’re growing cannabis on a secluded rural farm, it’s difficult to keep your 2-metre-tall pot plants a secret from your neighbours. Beyond the risk of theft, though, you also need to worry about protecting your plants from wildlife, the elements, and just about everything else that could potentially damage a plant.
Aside from locked gates and tall fences, you should also consider safety precautions like surveillance systems, motion-activated security lights, a greenhouse, or concealment such as other, taller plants.
Setting up an outdoor grow space
If you’ve weighed the pros and cons and decided that outdoor growing is right for you, then you’ll need to spend some time setting up a grow space. There’s a lot to consider here so I’ll try to keep things brief.
- Light
The ideal location for an outdoor cannabis plant is anywhere that receives direct sunlight throughout the entire day. Remember, the biggest benefit of outdoor growing is access to raw natural light, don’t squander it by planting your garden in the shade.
- Irrigation
Both underwatering and overwatering are express tickets to a ruined plant so you’ll need to pay careful attention to how much water your plant gets. Indoors, that’s a cakewalk but outdoor growers will need to contend with the elements. Many outdoor growers prefer pots to direct soil planting as it’s much easier to monitor their water levels.
A plant in full bloom can require up to 4.5 litres of water every day so make sure that your garden has easy access to water nearby. If you’re only growing one or two plants, you’ll be fine but nobody wants to be carrying 50 litres of water around every day.
- Wind and shelter
Wind is an underappreciated risk when growing outdoors. While a steady breeze is good for a plant’s development, a strong wind can topple even the mightiest tree. Additionally, the wind can carry all manner of debris which could knock a plant down for the count. There’s no universal solution here so do a little research into the specific needs of your climate.
- Read more outdoor grow tips
How much light does it take to grow cannabis indoors?
Getting the right lights is one of the most important parts of a successful grow. Balancing the needs of the plant with excess heat can be tricky but this is the one place where you can’t afford to cut corners. Basically, you want as much light as you can get—but not too much.
What size light is best for you depends on the size of your space and what type of light you use. Regardless, it’s typically better to opt for a larger number of smaller lights as these provide more even coverage.
HIDs
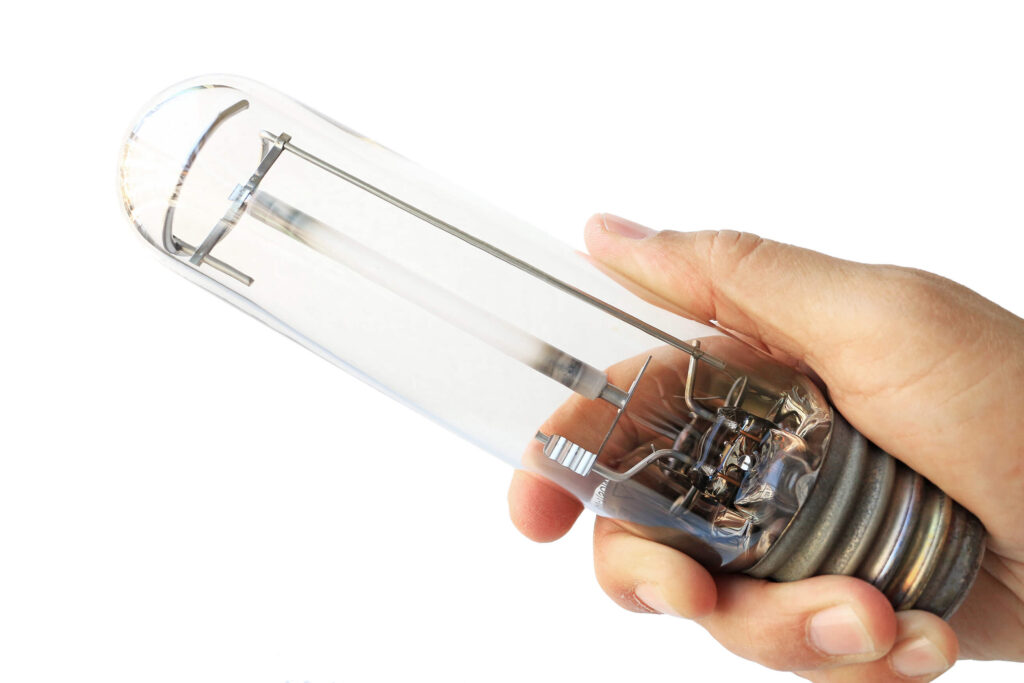
High-intensity discharge (HID) lights are the long-running standard and can be broken down in high-pressure sodium (HPS) and metal halide (MH) lights. These both have slightly different uses (HPS is better for flowering while MH lights are better suited for vegetating plants) but share the same pros and cons when compared to LEDs.
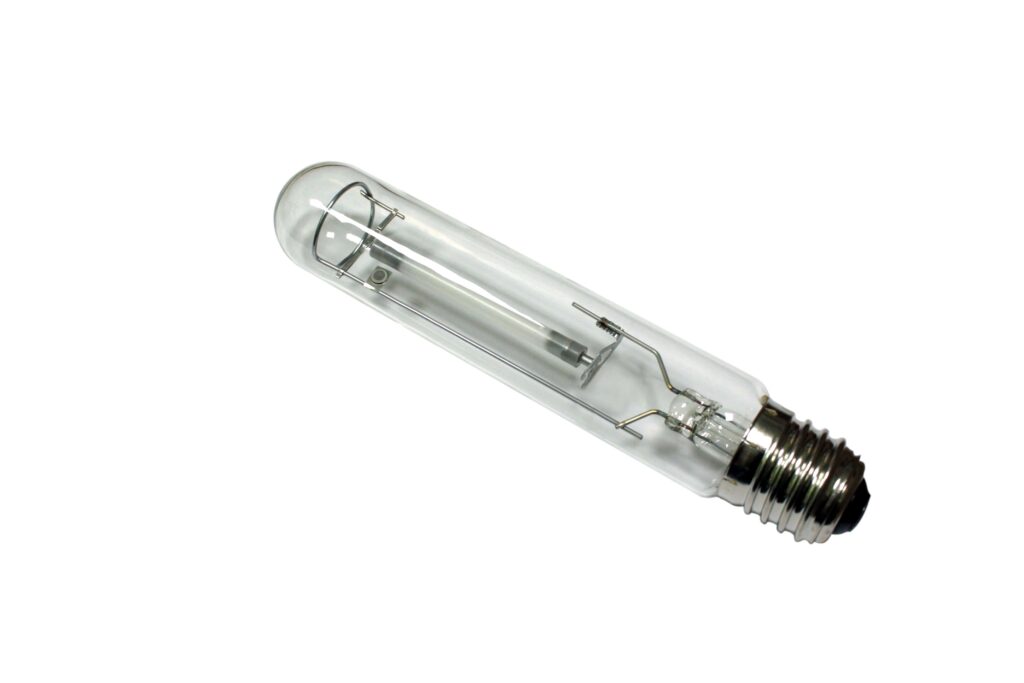
HID lights are cheap to purchase, easy to set up, and are incredibly powerful. The light from an HPS bulb is typically far more intense than a comparable LED making them a popular pick for growers who only care about results. However, HPS lights are incredibly inefficient and cost considerably more to operate over the long run. This inefficiency also means that they are very hot and will raise the temperature of your grow space considerably.
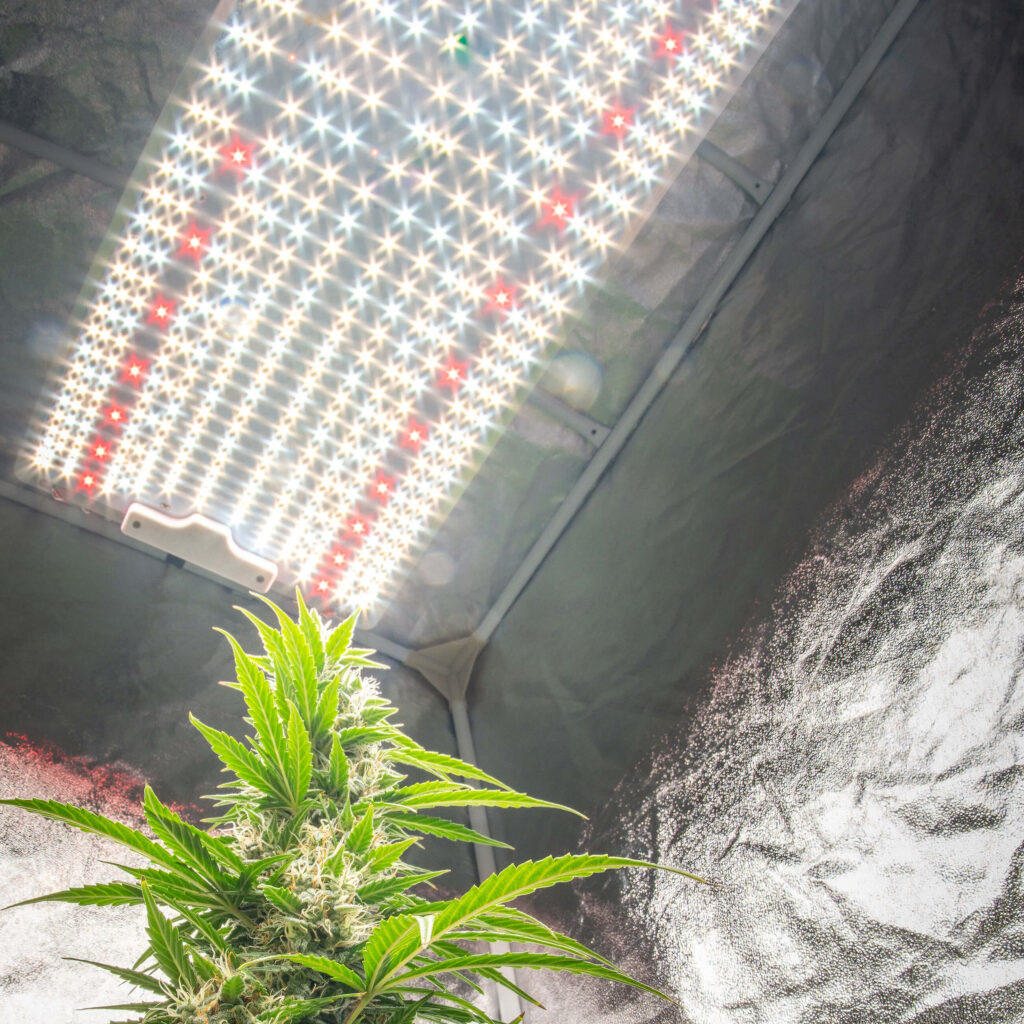
LEDs
Light-emitting diodes (LEDs) are a newer alternative to HID lights which are quickly becoming the industry standard. While LEDs might lack the raw power of HPS bulbs, they are far more efficient, often capable of outputting twice as much light per watt. On top of this, these lights run significantly cooler which can lead to further cost savings by not having to cool your grow space.
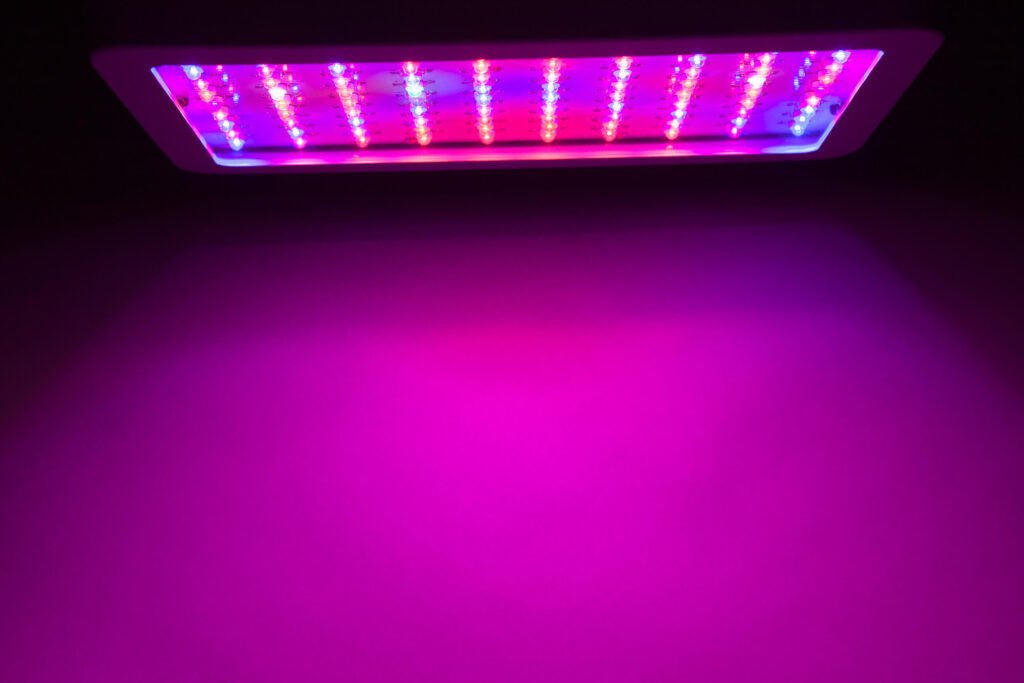
On the other hand, LEDs are generally far more expensive upfront. While this initial cost will be offset by energy savings in the long run, that could take a couple of years depending on your exact setup.
By the numbers
With all of that out of the way, how much light do you actually need to grow cannabis indoors? The table below provides a very rough guide but serves as a good starting point for your calculations.
| HPS Wattage | LED Wattage | Ideal Area (m2) |
| 150W | 100W | 0.6 m2 |
| 250W | 150W | 0.8 m2 |
| 400W | 250W | 1.0 m2 |
| 600W | 400W | 1.2 m2 |
| 1000W | 600W | 1.5 m2 |
No matter what kind or size you’re using, though, it’s important to keep one thing in mind; plants need darkness as much as they need light. Plants do most of their actual growth overnight so be sure to give your plants plenty of time with the lights off. For vegetating plants, an 18-hours-on-6-hours-off schedule is ideal.
Germination and seedling
OK, now that you’ve got your grow room all set up, it’s time to start growing. Before you can do anything, though, you’ll first need to germinate your seeds.
How to germinate cannabis seeds
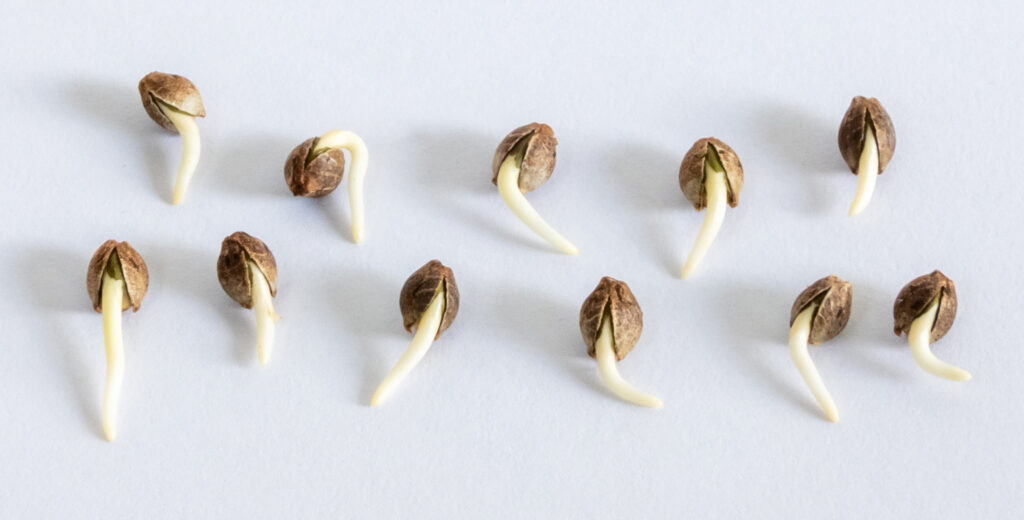
Germinating seeds is so easy that elementary students often do it as a science experiment. While there are several valid ways of doing this, I can only recommend the industry-standard paper towel method as it is easily the fastest and most reliable method out there. What’s better is that it requires no special equipment beyond what you’ve already got in your kitchen. All you need are some paper towels, a plate, and a plastic shopping bag.
- Simply fold up a couple of paper towels and place them onto a plate.
- Pour about 30 ml or so of water onto them. They should be thoroughly damp but not dripping wet.
- Spread your seeds on the paper towels making sure to leave a few centimetres between each one.
- Cover your seeds with another damp paper towel.
- Place this whole thing into an open plastic shopping bag and set it somewhere warm.
After 24-48 hours, you should see the seeds crack open to reveal a tiny white taproot. Don’t worry if this takes longer though – some might take up to 10 days to sprout. Once the taproot is about a centimetre long, it’s time to plant your seeds. Place the seed with the taproot facing down into your (damp) grow sponge or Rockwool cube, put it into your rooting tray, and put it under a weak light.
- Read more about germinating seeds
- Read more about the different parts of a cannabis plant
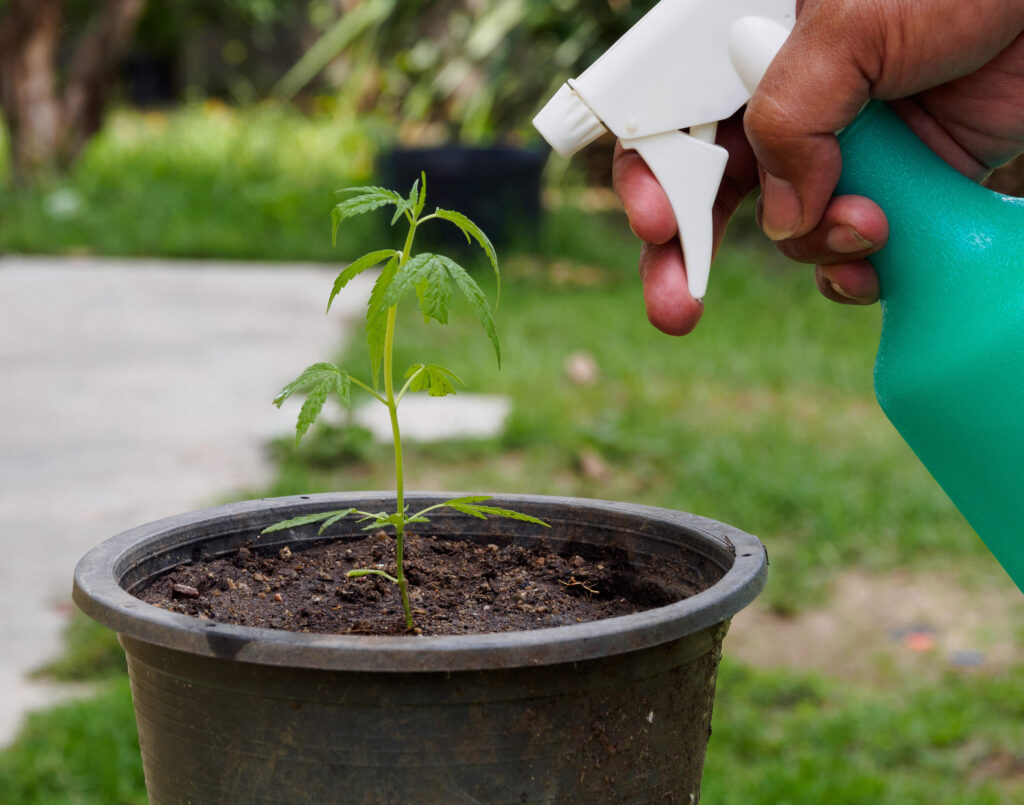
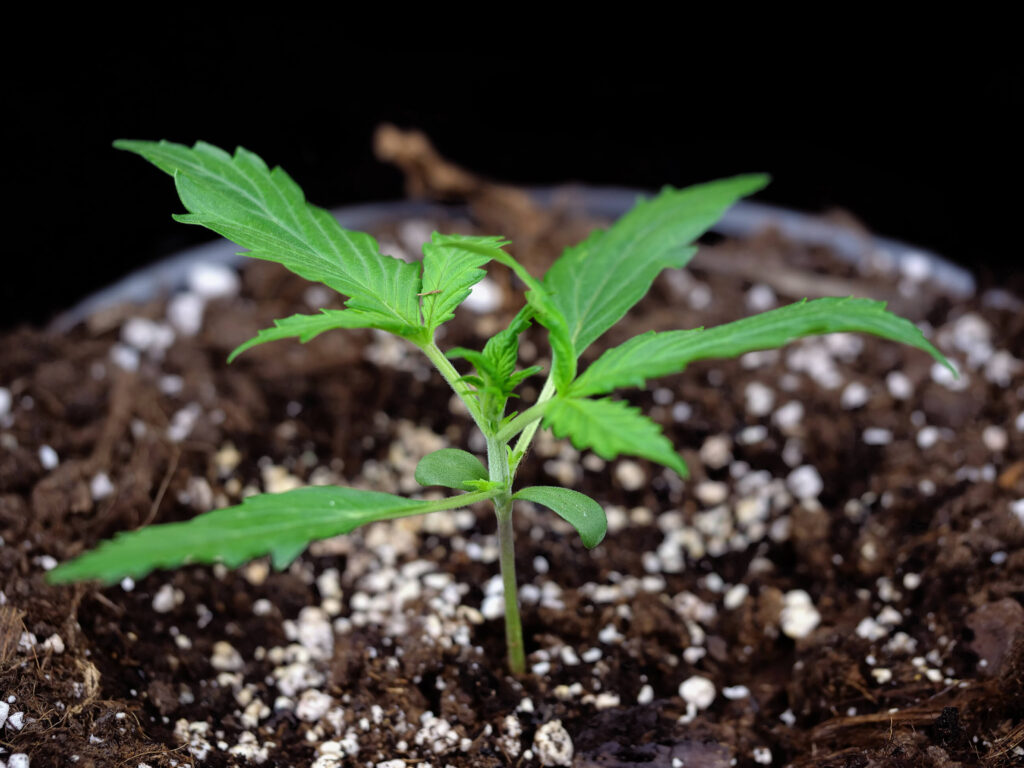
How to take care of cannabis seedlings
For the next few days, your seedling will be incredibly fragile and excessive heat, light, or even water can kill it before it’s had a chance to properly take root. Earlier, I mentioned that your rooting tray should ideally have a clear plastic lid and this is why. At this early stage, seedlings prefer to get their water directly from the air and a damp sponge covered in a plastic lid under a lamp will create an incredibly humid setting.
After a few days, though, it’s time to let your seedling breathe a little and it’s OK to give it an initial feeding with pH-balanced water after three or four days. After a week or so, you should notice the roots growing out of the bottom of your rooting medium and that means that it’s time to plant your seedling in whatever home you’ve prepared for it.
- Read more about the seedling stage
Caring for a vegetating cannabis plant
Once your plant is all set in its new home, the real fun begins. Over the next few weeks, you’ll notice your plant growing slowly and steadily as it develops its first sets of leaves followed by low, lateral branches. At this point, there’s nothing that you need to do aside from providing it with enough water and nutrients.
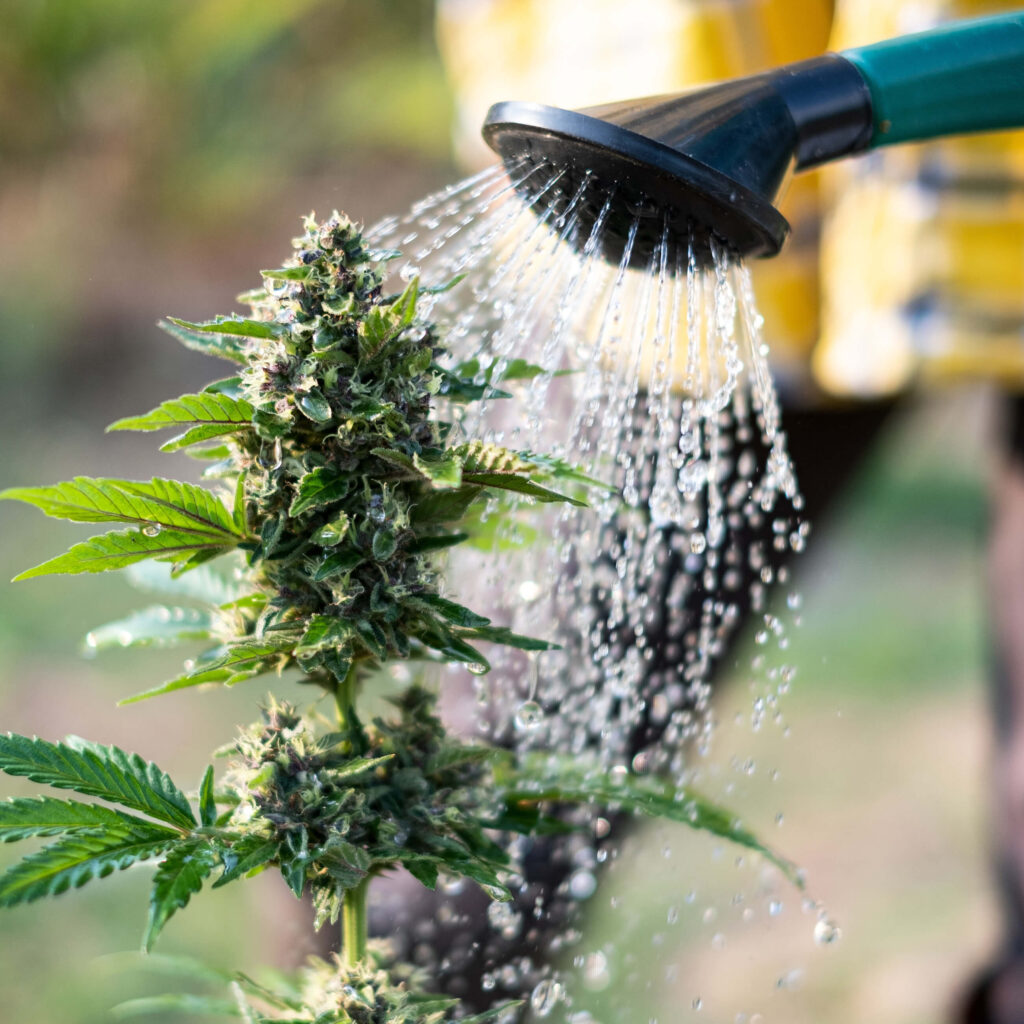
Watering and feeding cannabis plants
Freshly planted seedlings don’t need that much water for the first few weeks. Once you put your seedlings into a larger pot, your impulse might be to fully saturate the soil so that the seedling has adequate water right off the bat. This is something of a trap. Overwatering can be even more dangerous than underwatering and, at this stage, less is more.
Exactly how much water you should use each day will vary based on things like ambient temperature, humidity, airflow, plant age and size and more but, for all of our plants, we use this guide as a starting point.
| Plant age (weeks) | Volume of water per day (ml) |
| 1 week | 100 ml |
| 2 weeks | 200 ml |
| 3 weeks | 400 ml |
| 4 weeks | 800 ml |
| 5 weeks | 1000 ml |
| 6+ weeks | 1500 ml |
Of course, you’re not just using plain water. Most growers opt for liquid nutrients for their convenience, stable shelf life, and consistency. Whichever brand you use, be sure to follow the instructions closely. Using too much nutrient mixture can cause even more problems than using too little and can be much harder to fix.
- Read more about watering cannabis plants
- Read more about overwatering
Pruning cannabis plants during the vegetative phase
As your plant grows, you’ll likely notice that some lower leaves and branches aren’t getting as much light as they probably should. Outdoors, this is less of an issue as the sun moves across the sky and lights plants up from every angle. However, with a fixed light indoors, only the very top of your plant will get enough light to be truly productive.
In the week before flowering, identify which parts of your plant are getting the most light (typically the top three to five nodes of growth along the main stem and the lateral branches) and remove anything below that line. If you do it right, you’ll probably feel like you’re removing more than you need to, but cannabis plants do most of their growth while flowering and you’ll be amazed how quickly they bounce back.
Many growers will even remove the entire top of their plant in a practice known as “topping” which forces the plant to split into two main talks which will each grow a full cola. Topping is one of the easiest and most reliable ways to up your yield, but it’s not without risks.
Now, if it’s your very first time growing, pruning isn’t necessary and it’s probably best to focus on more important things. But if you’re feeling bold, this is a great way to get bigger harvests.
- Read more about the vegetating (growth) stage
Caring for a flowering cannabis plant
To begin flowering a cannabis plant, you need to do two things; change your light schedule and change your nutrients. Switching your lights to a 12-hours-on-12-hours-off schedule will signal to your plants that it’s time to start flowering and they’ll begin making the change almost immediately. To make sure that they have all they need, you’ll need to switch to a nutrient formulated specifically for flowering as plants have different nutritional requirements at this stage.
Early flowering
Over the next few weeks, your plants will undergo “stretch” where they are likely to double (or even triple!) in height. For this reason, be sure to switch your plants over to flowering well before you might think you need to. Trust me, you’d much rather have a plant that’s shorter than you wanted than deal with the daily hassle that is a plant growing out of control.
Male vs female cannabis plants
By this point, it should become possible to tell which (if any) of your plants are males. Male plants are largely considered “useless” by many growers, as they don’t grow the flowers (buds) that many of us are looking for. What’s worse, is that even a single male plant can pollinate an entire grow room, which will result in seedy and less potent buds.

Luckily, spotting a male plant is pretty simple. While female plants will display their first signs of flowering with small white hairs at the inner nodes, male plants develop small round pollen sacs that hang just below the inner nodes. If you see even a single pollen sac on your plant, you’ll want to remove the entire plant immediately. Be careful not to jostle the plant too much to avoid it releasing any pollen.
If you’re using feminized or autoflowering seeds, the odds of your plant being male are less than 5%, but it is still possible so be sure to check thoroughly every day until you’re sure that you’ve only got female plants.
- Read more about the difference between male and female cannabis plants
- Read more about what to do with male cannabis plants
Mid-flowering & training cannabis plants
As your plant grows, you may find that it’s getting a bit larger than expected, or that flowering sites which once got ample light are now shaded out. While that can be a bummer, it’s no reason to panic. By tying down branches (or even the main stem), you can force your plant to grow laterally, at least for a time. This can help growers with more horizontal area than vertical headroom get the most out of their space.
After two or three weeks, you’ll begin seeing the very first signs of flowering as small white hairs begin to appear at the inner nodes (where the branches meet the main stem) as well as at the tops of branches. Over the next few weeks, your plant’s vertical growth should slow down considerably as the plant shifts its focus to flowering. This slowdown will be accompanied by an explosion of floral growth as your plant blooms from head to toe.
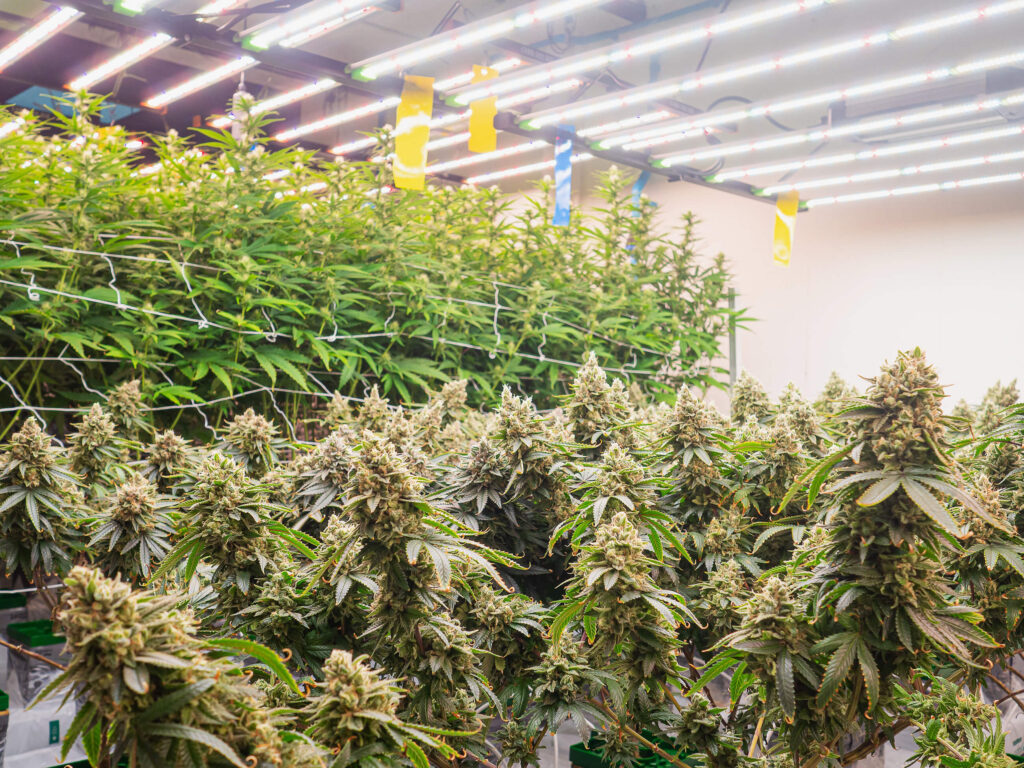
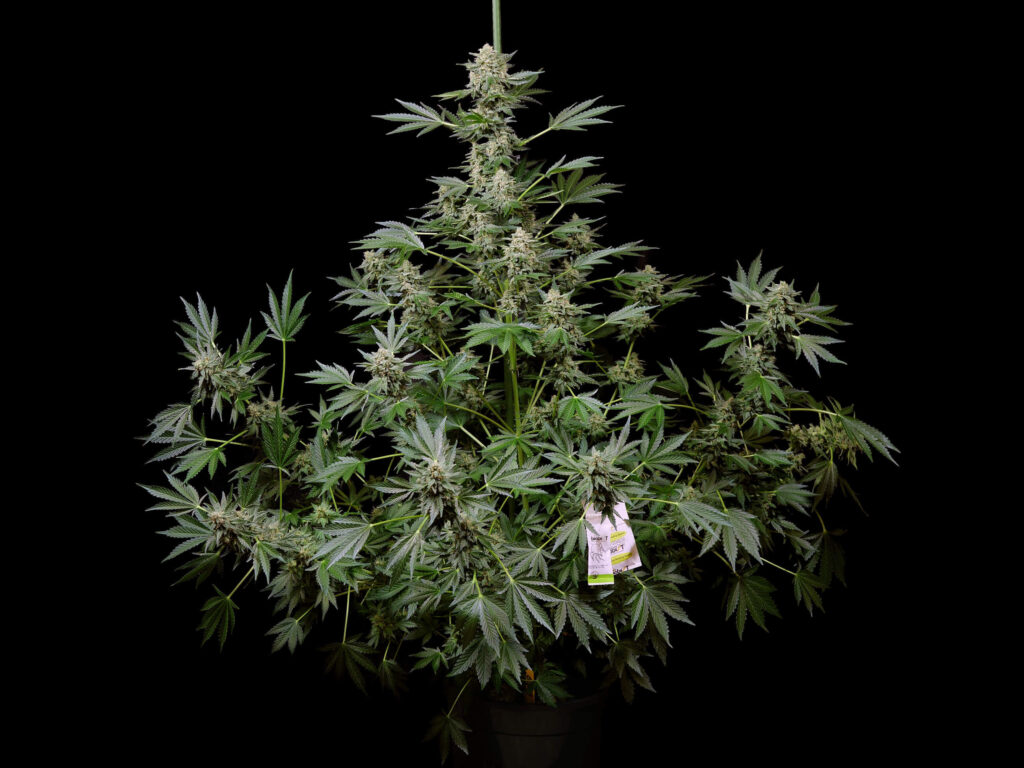
Late flowering
After about six to eight weeks (varies by strain), you’ll enter the later flowering phase which is marked by an almost complete stop in vertical growth and rapid fattening of buds. If you’ve gotten your plant this far, then you’ve been doing everything right and there’s nothing left to do but to keep on trucking and wait for nature to run its course.
Troubleshooting problems during flowering
Cannabis plants are complex living organisms and there are a lot of different things that can wrong. Problems in the vegetative phase are annoying, but typically only slow down the switch to flowering. However, problems later in a plant’s life can be catastrophic. Keep a careful eye on things and act as soon as you spot anything out of the ordinary.
- Read more about the flowering stage
Why, when, and how to flush cannabis plants
“Flushing” is the term for giving your cannabis plants only pure water—without any nutrients—at the end of their life cycle. This helps to remove any excess salts and nutrients from the growing medium which in turn prevents them from being absorbed by the plant in its final days or weeks. Plants that haven’t been properly flushed can retain excess nutrients, leading to a harsh or chemical taste.
For plants grown in soil, flushing typically occurs in the final 10-14 days before harvest, whereas plants grown hydroponically only require 5-7 days of flushing.
To flush a soil setup, simply water it with pure, pH-balanced water (pH 6.0-6.5) without any added nutrients. Water the plants thoroughly, allowing excess water to drain out and immediately dispose of this runoff. Repeat this process several times over the flushing period.
For hydroponic setups, the process is even easier. Just replace the nutrient-rich water that’s currently being used with clean, pH-balanced water and continue to run everything as usual.
- Read more about flushing
How to harvest cannabis
Once your plant is ready to harvest, you’ll need to move quickly as each passing day will result in less potent buds as the plant turns THC into CBN which is not psychoactive. Harvesting cannabis plants is a fairly straightforward, though labour-intensive process so it’s usually a good idea to grab a few friends.
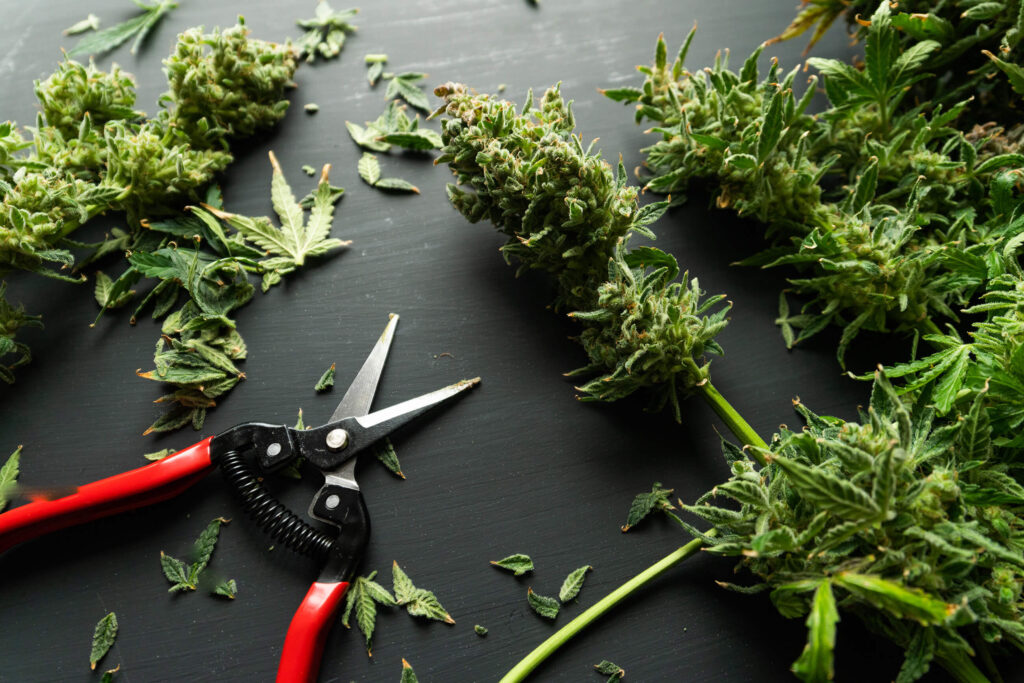
The very first thing you’ll need to do is cut your plants down at their base. Next, you’ll want to trim off the leaves, exactly how many is an open debate with many growers only removing the fan leaves at his point, leaving the buds to be trimmed later. This is known as “dry trimming” since you’re trimming the buds when they’re dry.
Alternatively, some growers prefer to remove all of the leaves from the buds at this stage in a process called “wet trimming”. There’s no objectively “best” choice here but I’ll go over the pros and cons a bit further down.
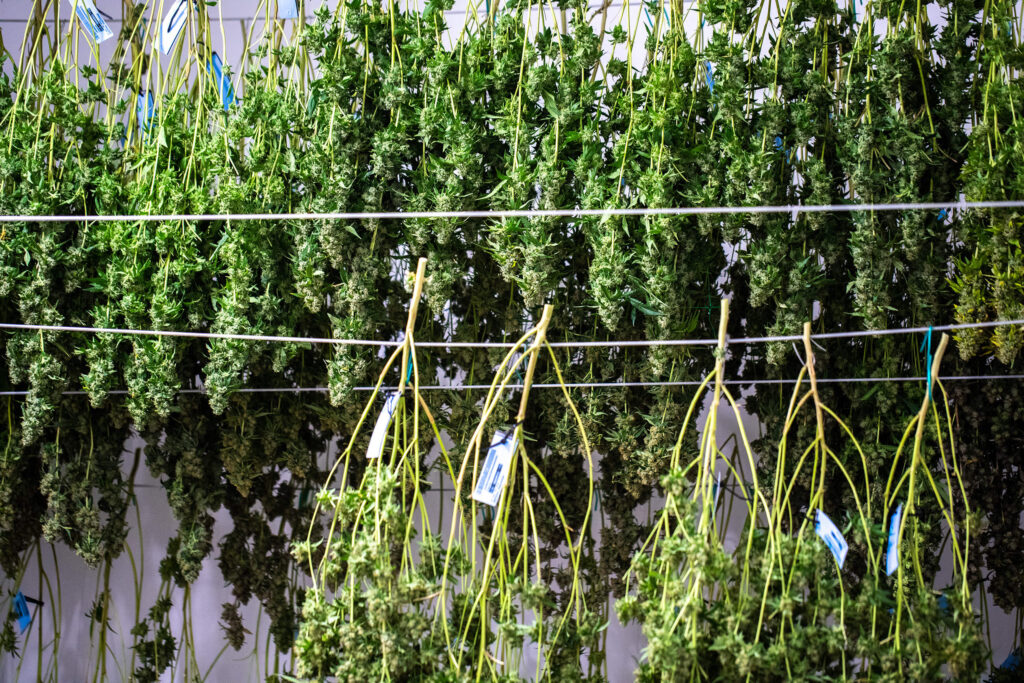
Either way, once you’ve finished trimming your plants, you’ll need to hang them upside-down until they’re dry enough for curing. Ideally, your drying room should be about 15.5°C with a relative humidity of about 50%. You’ll need to leave your plant hanging here until the smaller branches snap when bent—typically about 10-20 days.
Once the plant has dried to this point, it’s time to prepare the buds for curing. If you wet-trimmed, then all you need to do here is a quick check that you didn’t miss anything but for those practising dry trimming, you’ll need to spend the time to clean up your buds before curing.
- Read more about how to harvest cannabis
Wet trimming vs dry trimming
At the end of the day, this largely comes down to personal preference, but there are perfectly good reasons to choose one over the other.
Wet trimming pros
- Since the leaves are still firm and sticking straight out, wet trimming is easier.
- Removing excessive vegetation lowers the risk of mould during the drying stage.
- With fewer leaves, the plant will dry much faster.
- The resulting buds often look nicer.
Wet trimming cons
- Since the buds haven’t had any time to dry, they are incredibly sticky which can gum up your tools.
- Since these buds are still super sticky, you’re likely to lose more trichomes compared to dry trimming as they stick you your hands and tools.
- Drying a cannabis plant too quickly can limit its ability to properly develop an ideal flavour.
Dry trimming pros
- Dry trimming preserves considerably more trichomes which can result in more potent buds.
- The slower drying often leads to smoother smoke and a richer flavour.
- Typically less messy as the buds aren’t so sticky.
Dry trimming cons
- Removing a bunch of tiny dry leaves from buds can be tricky and time-consuming.
- The resulting buds may be less visually appealing.
- Overly leafy weed can have a harsh flavour.
- Dry trimming requires more space to hang your plant.
- Read more about trimming
Tips for curing cannabis
The curing process is the real unsung hero of top-quality cannabis. We’re all eager to sample the fruits of our labour, but by giving your buds the time to properly cure, you massively increase their flavour, aroma, consistency, and even potency. While there’s no single perfect recipe for curing cannabis, the basic process goes like this.
- Make sure that your plants have sufficiently dried and that your buds are all trimmed.
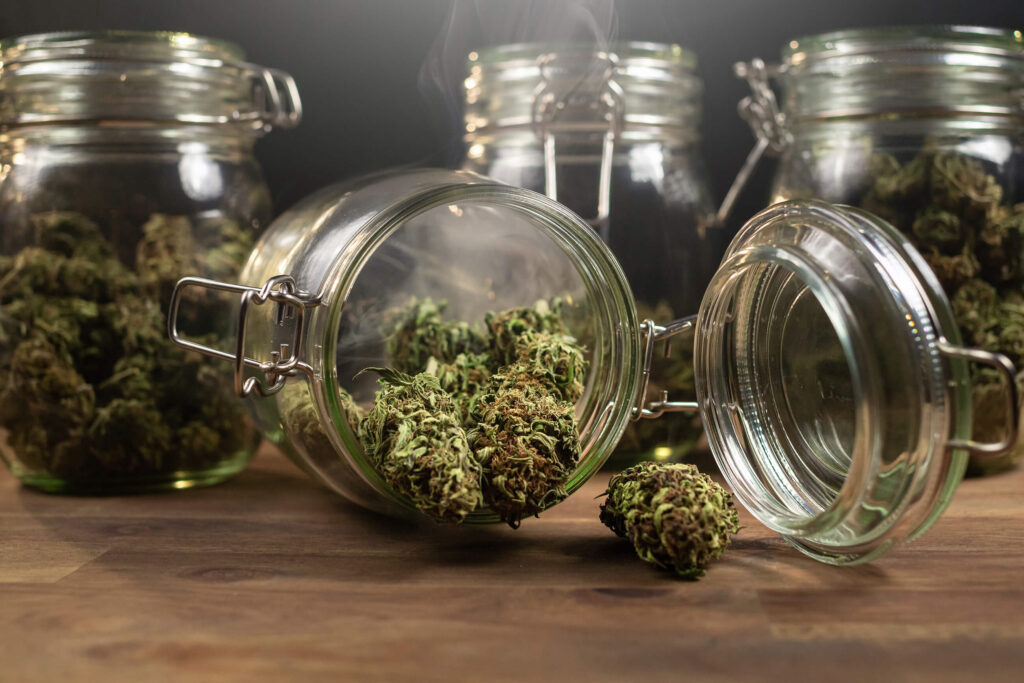
- Place the buds into glass jars making sure not to squeeze too many in. They need space to breathe.
- Leave these jars unsealed for the first 25 hours to allow much of the remaining moisture to evaporate.
- After a day, seal up your jars and put them in a cool, dark place.
- Every six hours or so, “burp” the jars by opening them for about an hour (you can leave them overnight, just open them first thing in the morning). Be sure to give the jars a little shake or a stir to make sure that every bud gets a chance to sit on top.
- Over the next several weeks, gradually reduce the frequency of these burps to once per day.
- After about six weeks, your buds should be the perfect consistency.
While waiting for six whole weeks after harvest to sample your buds might sting, the wait will make that first taste all the sweeter. Don’t rush this process.
- Read more about curing weed
Controlling odour in an indoor grow room
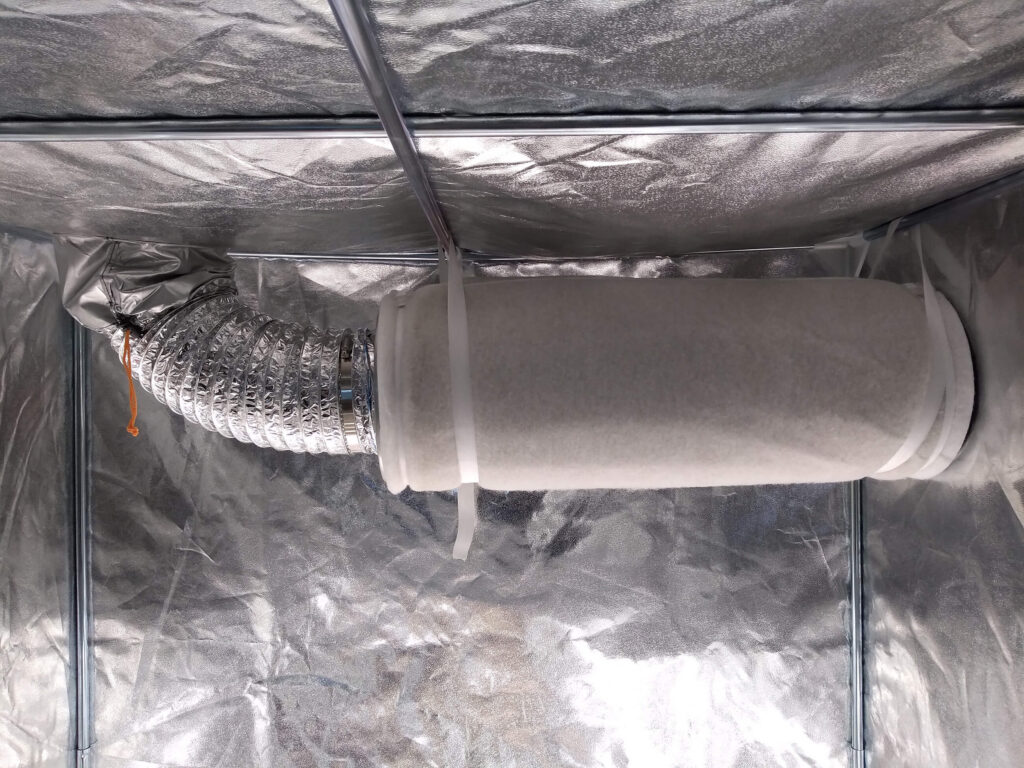
Certain cannabis strains can emit a tremendous amount of odour and some indoor growers may not want their entire place to smell like fresh weed. Aside from choosing low-odour strains like Northern Lights or Gelato #420, plenty of tools are available to help mitigate unwanted smells.
The most important item for anyone who values discretion in their grow is a good carbon filter. These connect directly to your external ventilation and do an incredible job of removing unwanted smells from the air. On top of that, air fresheners of odour blockers are widely available and make excellent additions.
Daily maintenance of your grow room
Growing cannabis is a full-time hobby which means that you’ll need to spend at least a little time every day in your grow space to make sure that everything is running smoothly. Over time, you’ll develop your own rhythm and pattern but for starters, a good daily checklist looks something like this:
- Water your plants. While this may not need to be done every day during the seedling and vegetative phases, daily watering of flowering plants is a must.
- Check for pests, mould, nutrient deficiencies, or other signs of stress. Ideally, you’ll give each branch and leaf at least a once-over every day. If you’re growing one or two plants, this doesn’t take too long.
- Prune dead leaves as needed. Once a leaf starts to turn yellow, it’s time to go. If your leaves are yellowing during vegetation, something’s wrong. However, as plants get into the later stages of flowering, lower leaves will often turn yellow and die off.
- Make sure plants are spaced properly. Plants don’t like to bump up against each other so make sure they have plenty of space and aren’t blocking each other’s light.
- Check the temperature and humidity and make plans to adjust them if needed.
- Check that all of your lights, timers, pumps, fans, etc. are running properly.
Practice makes perfect
Growing cannabis is the kind of thing that’s easy to do but much harder to do very well. With so many moving pieces and things to keep track of, it can be overwhelming at first. However, after a couple of successful harvests, you’ll quickly develop your green thumb. Growing is an incredibly rewarding hobby and once you get a taste, you’ll be hooked for life.
We hope you enjoyed this guide, where we tried to cover as many aspects about a cannabis grow as possible. There are so many topics we didn’t cover, from cannabinoids to terpenes, and from all the different cannabis varieties that you can choose from to creating your own strain, but we had to stop somewhere. However, make sure to check out all the other articles on our extensive blog, and of course – ask any questions you may have in the comments!
- Disclaimer:Laws and regulations regarding cannabis cultivation differ from country to country. Sensi Seeds therefore strongly advises you to check your local laws and regulations. Do not act in conflict with the law.

Thanks Kenny.
Good one!
I think you nailed it with this Guide.
Hi and thanks for this guide!
Would you consider to make a PDF of it, for us to read it easily on a tablet reader?
Thanks again